TLDR: A long nerdy post about hobbies, tech, and rabbits.
Extended Rabbits
Backportin', not retrofittin'
Colorful and creative addition to the retro vibe…
We’re mimmicking the look and feel of the AEK II.
This post is about mimmicking the look and feel of the Apple Extended Keyboard II (AEK II), without replacing it, so I’m using the word “Backporting” here. This uses no actual parts from the AEK II, but the actual retrofitting of an AEK II would be a dream!
Update: posted the mini article about the AEK II I originally penned last year: AEK II

https://en.wikipedia.org/wiki/Apple_Extended_Keyboard
So let’s go through this: the why’s, the hows, and the what fors of vintage, mechanical, wireless, custom built, and sometimes horrible keyboards. In no particular order, because Luke’s brain.
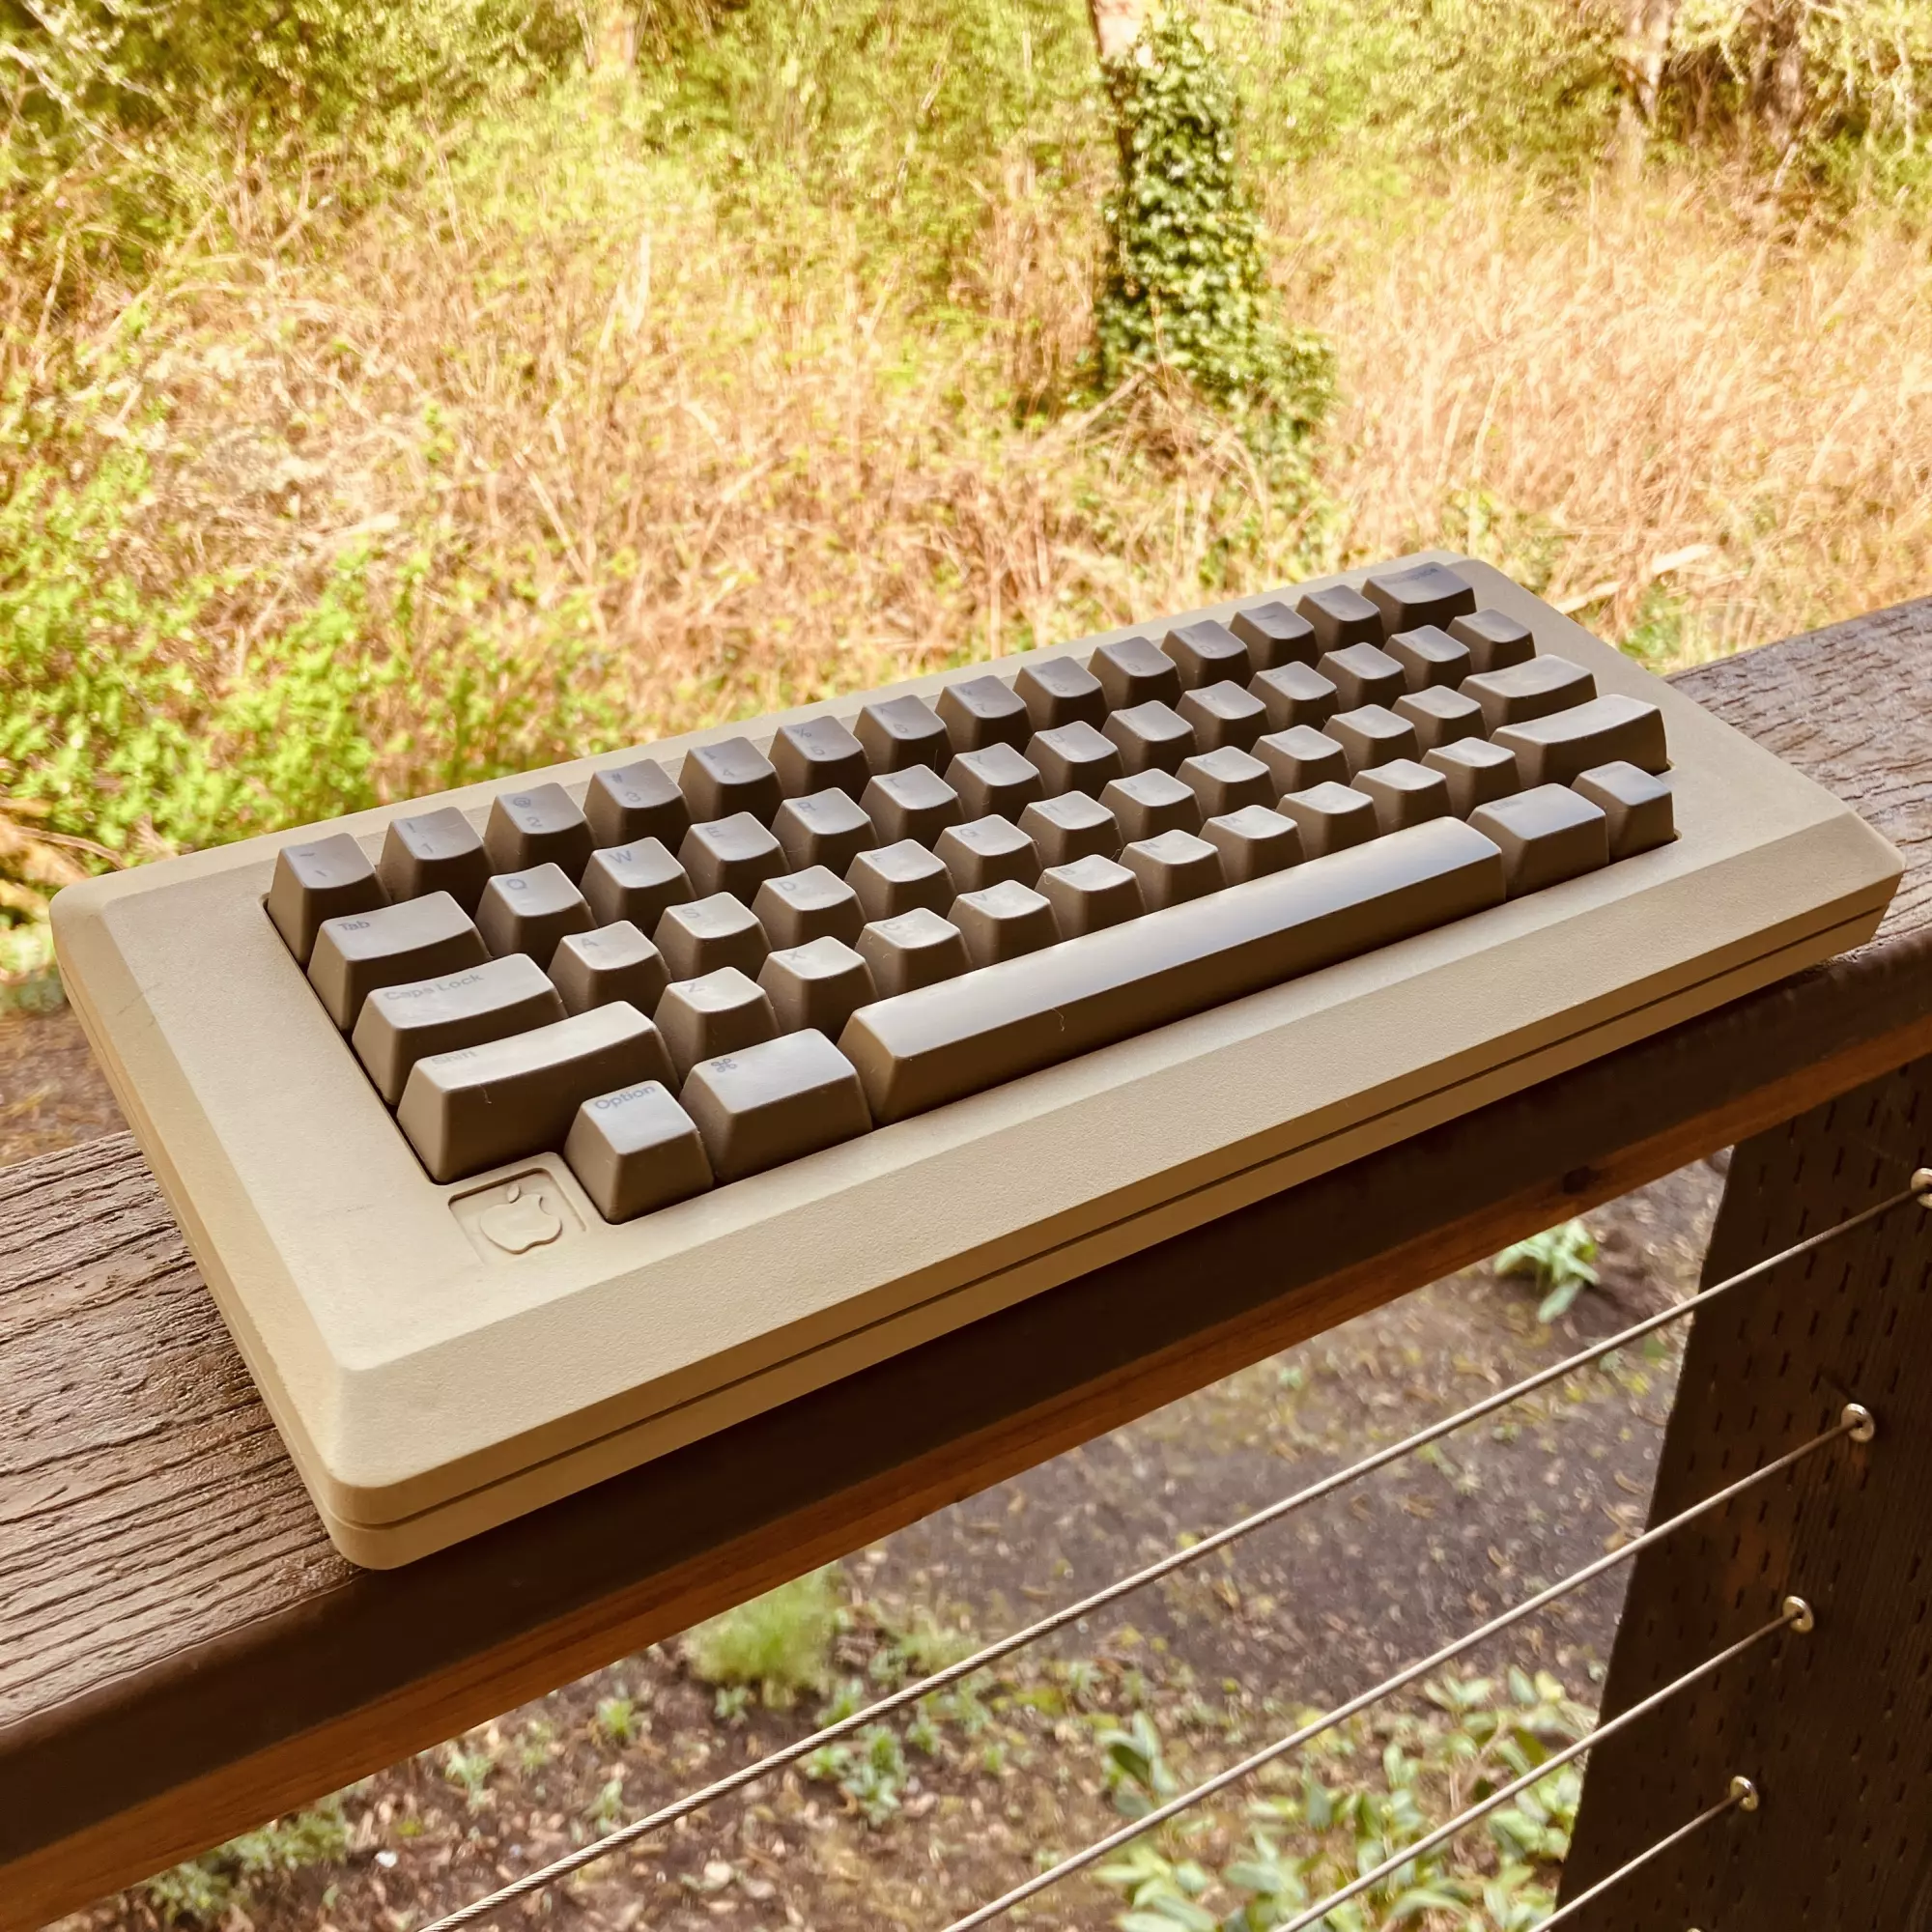
I’ve always loved the AEK II which appeared around 1989. Not purely in a nostalgic way, more because it was one of those things that just worked the way it should. The layout, the weight, possibly the way it sounds when you type on it? Okay, that really didn’t matter at the time. But nothing feels accidental about its design, however, muscle memory still plays a big part in this post.
I still have two original AEK II keyboards and I still use them, both adapted to modern Macs using ADB to USB adapters.
Apple Desktop Bus to Universal Serial Bus Adapter:
I’m using the wonderful https://www.tinkerboy.xyz/product/tinkerboy-adb-to-usb-keyboard-mouse-converter/
It would be quite the undertaking, but not impossible, to recreate these keyboards using current tech. But as I explored the task, it became more about asking whether something modern could sit alongside it and feel related.
Why the form factor still matters
I don’t think the AEK II became a classic by accident, or simply by its age. It’s a full-size keyboard, with a proper arrow key cluster and a numeric keypad that exist in their own space, and this is important. After years of working in print design, moving around within design layouts, entering numbers and data, navigating grids and forms, this particular “100%” keyboard layout stopped being something I thought about. It just became the keyboard where my hands knew where to go when needed.
Using smaller or more modern keyboards feels strange in a way that’s uncomfortable and frustrating.
In the current mechanical keyboard world, 100% size keyboards are seen as way too massive and desk hogs that are unnecessarily large, to the point where pushing the other way to make things incredibly small is a minimalist cult of micro keyboards that are incredibly small. This keyboard gained the title back then as being an Aircraft Carrier of a board because of its size and large edges.
Regarding size and materials, at some point around 1999 with the advent of the iMac, Apple keyboards became pretty difficult to enjoy. I’ve used so many of them: the clear ones, the white ones, the aluminum ones; yet the shine of them never lasted for very long. The feel of the keys is shallow and the switch mechanisms feel vague. After only a few months the plastic develops that shiny and slippery surface that makes everything feel worn out… even when it wasn’t. The modern aluminum keyboards look fine from a distance, but typing on them feels cold and unforgiving, as if it were designed to be thin and sleek, and modern-looking, at the expense of them being nearly unusable for more than a few hours.
We tolerated the keyboard tech because they came with the computers, not because we wanted to use them. So at a certain point, at least for me, that constant low-level annoyance adds up, especially for those that type for a living.
I’d picked up an old AEK II a few years ago and added an older ADB adapter from Drakware which worked very well.
ADB to USB adapter:
https://www.drakware.com
Earlier this year I picked up another AEK II off ebay hoping it had full functionality, just in case my older one busted. Yep, all working fine!
So to fix the past?
There’s no need to fix the AEK II for this project. The original Alps switches are still great. They feel good, they sound good, and they were built well. That part isn’t the problem.
The issue is noise and ease of use, among other things. In a shared office, an AEK II makes its presence known whether you want it to or not. What I wanted was something quieter, with new switches, modern connections, and the same sense of physical confidence, and surely this is doable.
Actually, one issue this new keyboard did not fix is the persistent layout of the Command button and the space bar. The right edge of the command button should line up with the right edge of the X key. When it doesn’t, your left hand contorts into a claw when using common shortcuts like Cut, Copy, and Paste with the X, C, and V keys.
Ah, well. That flaw is hard to fix in newer keyboards.
Holes & distractions
It doesn’t take long to realize that recreating an AEKII properly is a serious rabbit hole. To really do it, you’d need to somehow bring the old switches or accurate reproductions into the updated common switch design, custom keycaps with the right legends and profile tooling, hopefully plastic that matches the original color and texture… oh, and a new printed circuit board! …and a steel plate and internal structure that behaves the same way, likely with a lot of sound deadening. Then perhaps a rechargeable battery, oh, and USB-C! Bluetooth, too?
Once you start adding up the cost and time of creating prototypes, revisions, one-off manufacturing, and the time needed to get it all right, it stops making sense for something meant to be used every day for one person. This is how interest checks and group buys get started.
Not this time.
I wasn’t trying to build a perfect replica or a museum object (even now my mind is considering what that would look like!). I was trying to keep the experience (and the project) intact. Using existing parts that already solve most of the problem felt like the right boundary to set.
Related: Creating an extrapolation from era tech:
https://youtu.be/H5QQ0ECfwyE
Keycaps
Speaking of keycaps, they turned out to be the hardest part of this whole thing. A lot of sets that reference Apple keyboards lean into novelty. Bright colors, playful icons, things that look good in photos but don’t really belong on a desk long term and certainly not on this approach. Other sets miss the point in quieter ways, usually with typography that’s more decorative instead of functional. I suppose I needed something in the middle.
What I was looking for was actually pretty simple. Beige, not white. Tasteful key legends in the correct position. Typography that felt like it was there because it needed to be, matching the original design.
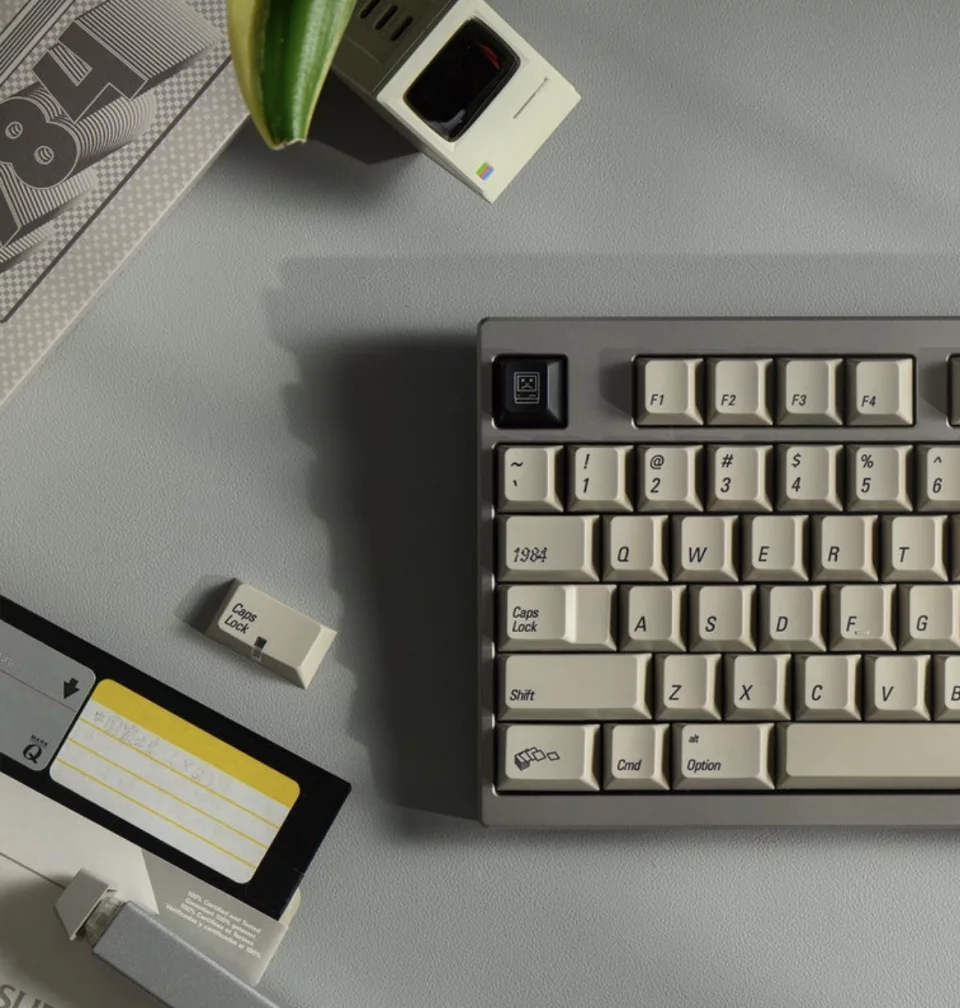
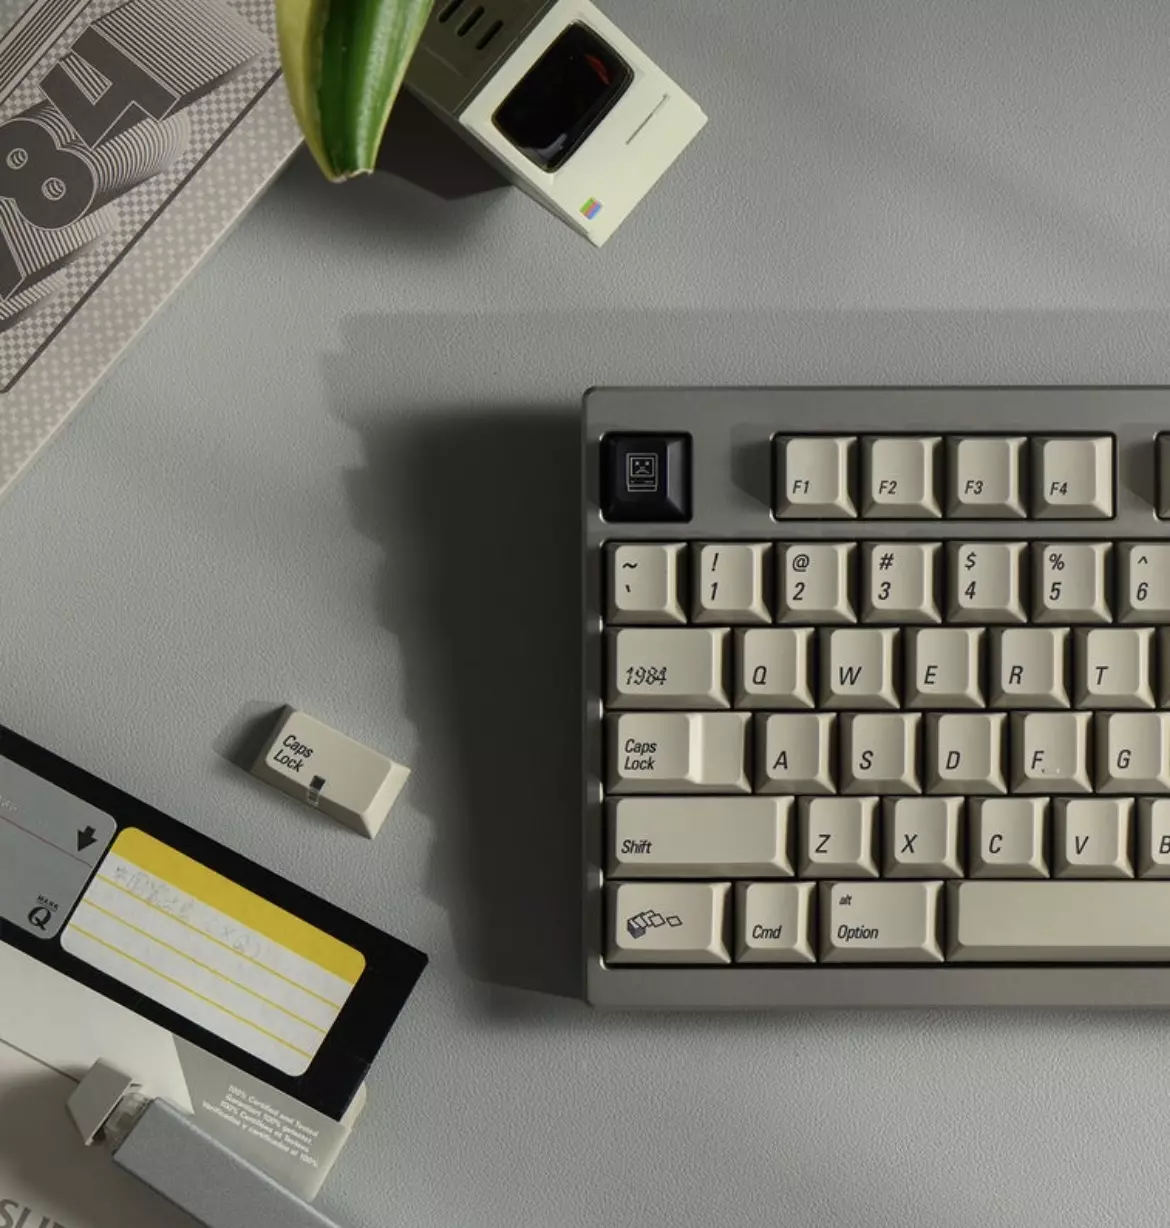
While embarking on this little quick(?) project, my order of MVKB‘s Synth capset arrived, made by Tim Van Damme, who has become quite the keycap savant and designer.
Proper beige look, but not what we’re going for here.
The amazing MVKB Synth keycaps going on the Keychron Q6 Max…
Proper beige look, but not what we’re going for here.
A really incredible keycap design and is pretty special. Highly-recommended! But for this project, I was looking for more of the design he made for the Classic set:
Sold out!
Which brings me to:

Oh, here they are!
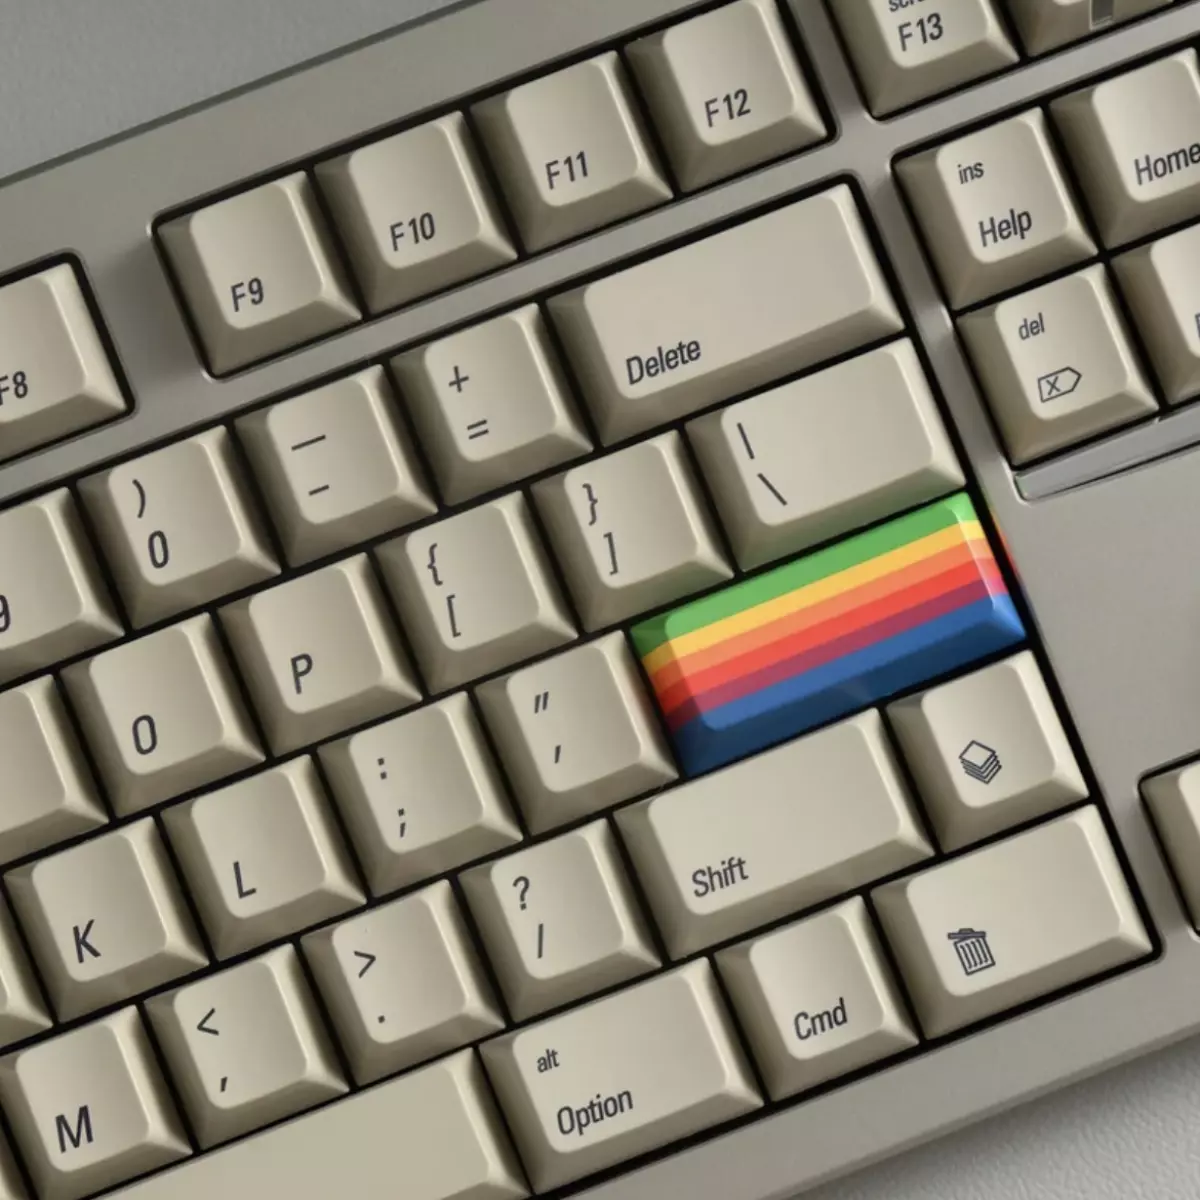
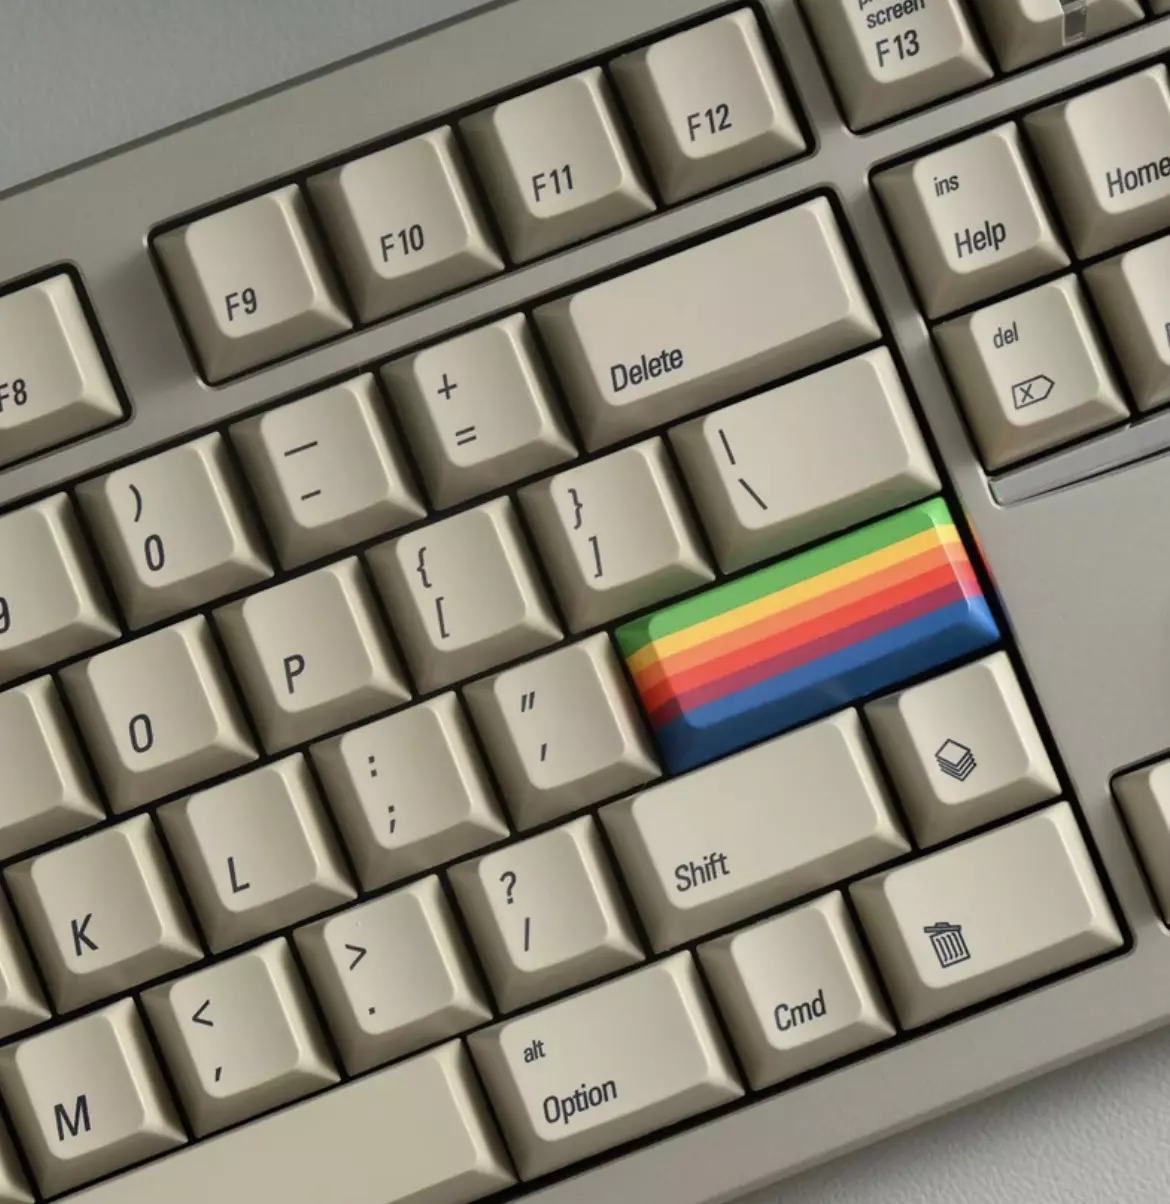
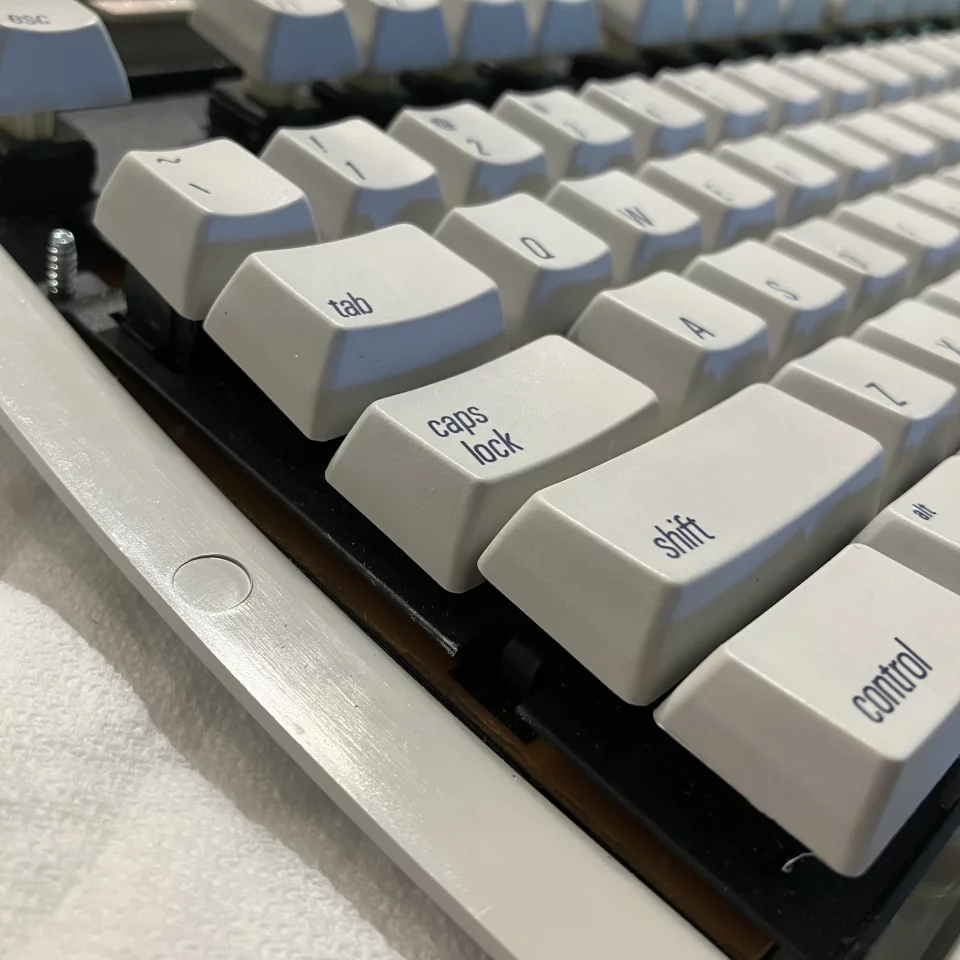
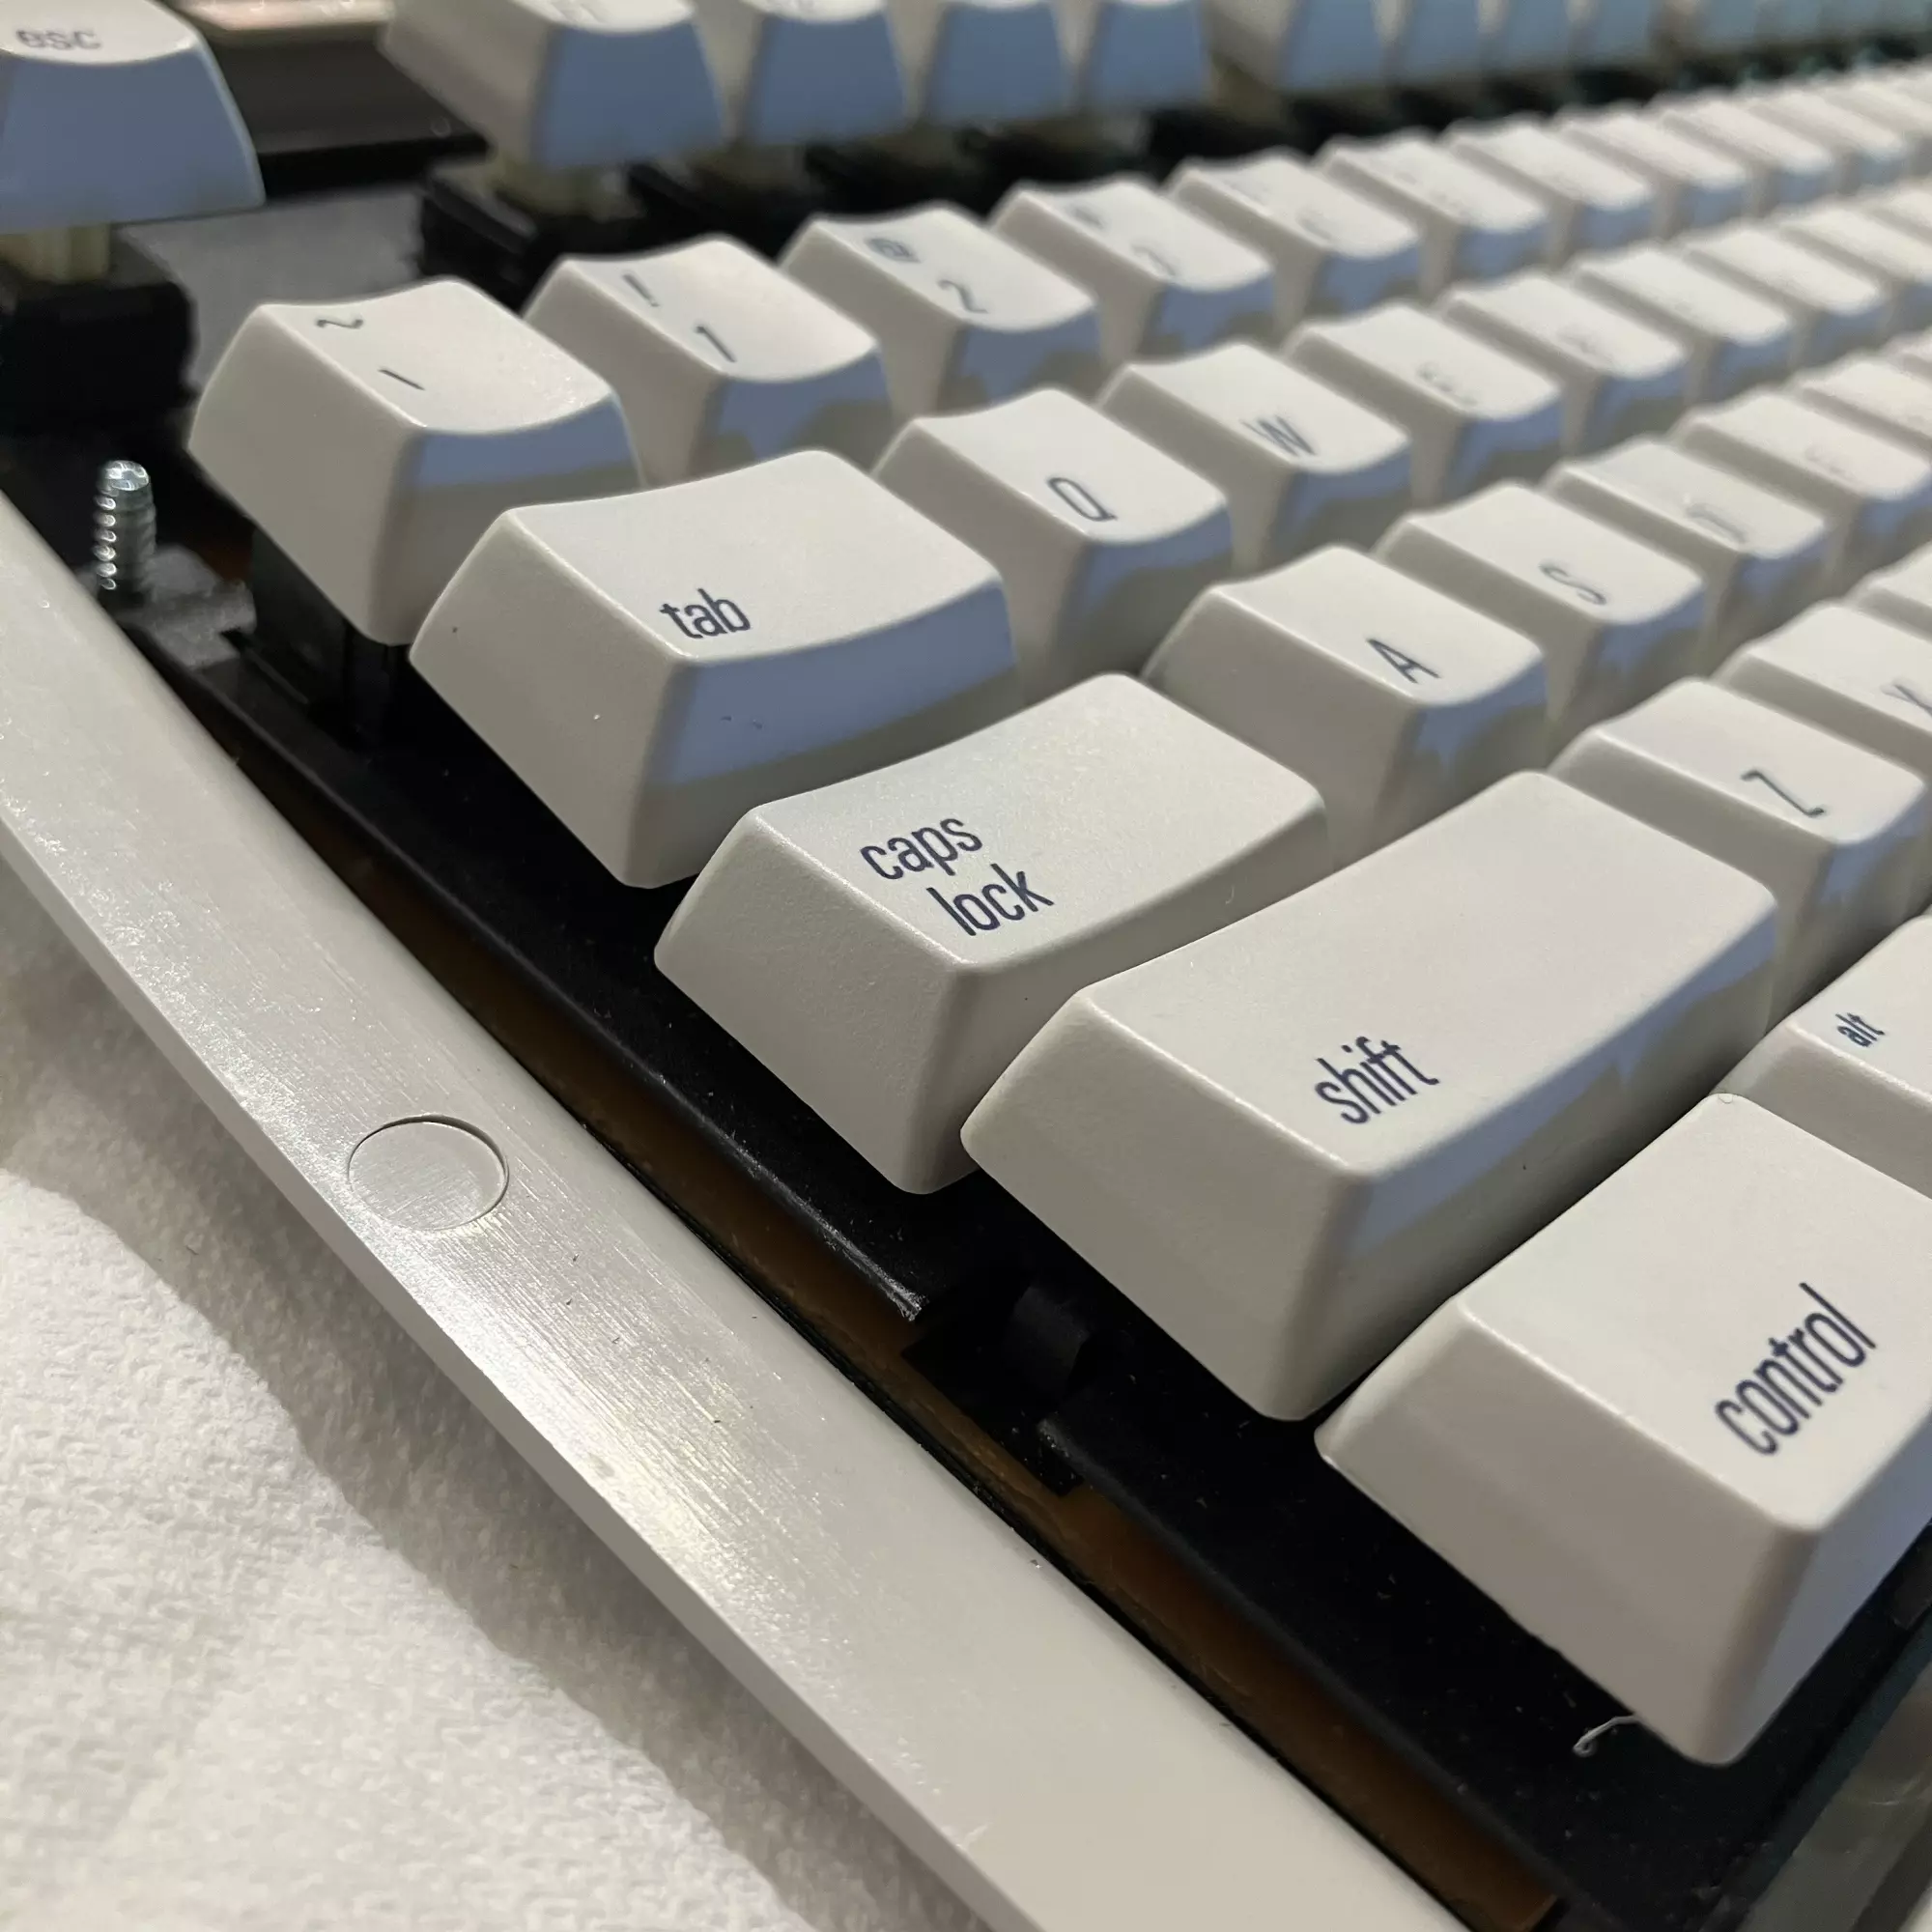
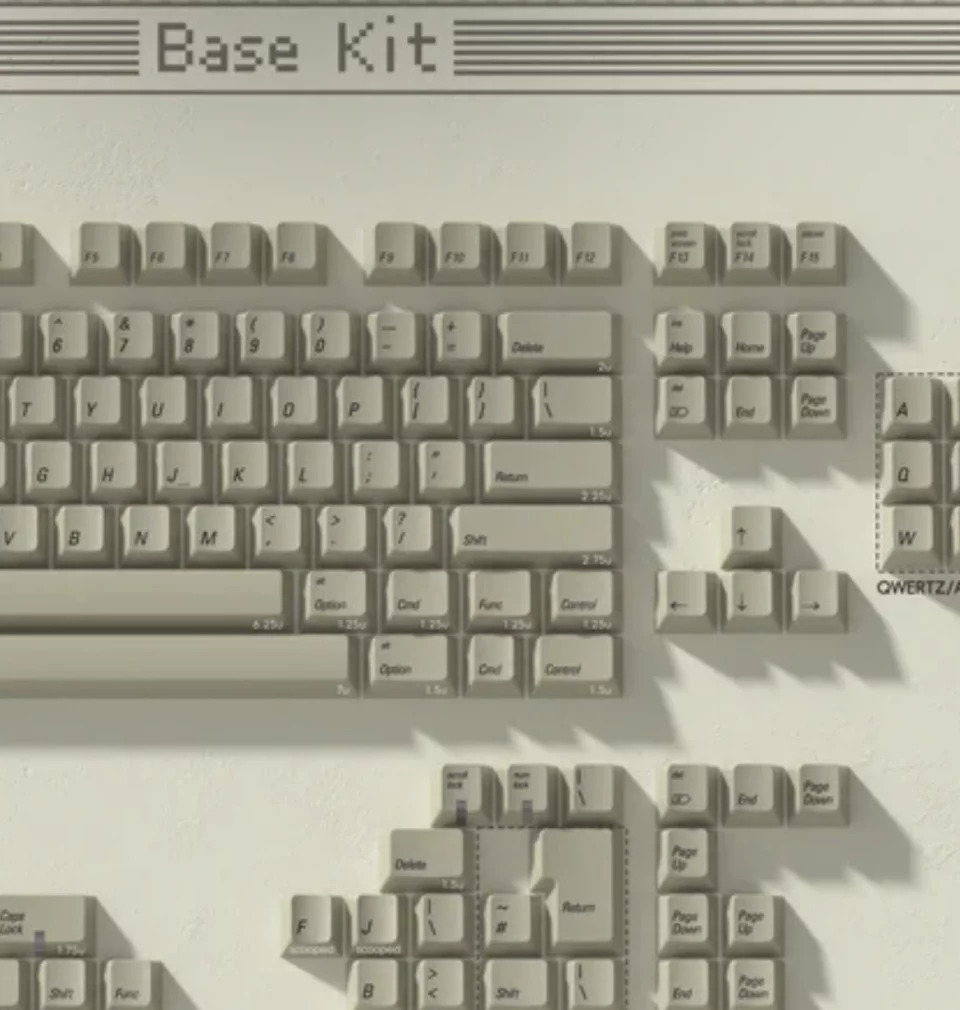
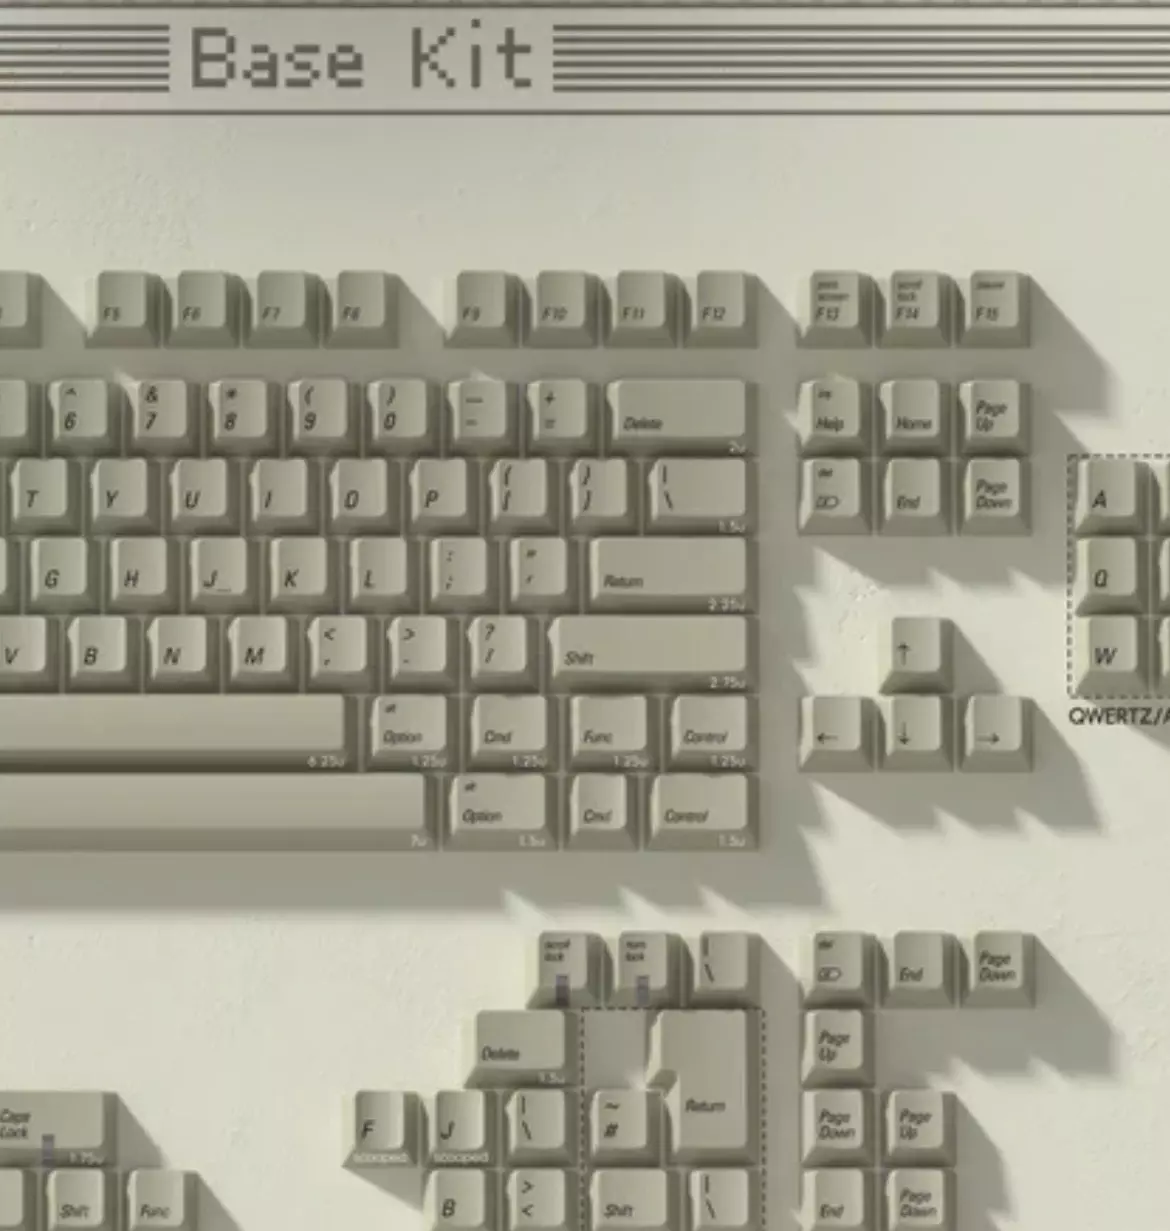
The PBTfans 1984 keycap set was the first one that felt close enough so I’d stop looking. The color lands in the right place and doesn’t try too hard. The legends use Univers Condensed Oblique in the lower left of each key, which immediately felt familiar in a way that’s hard to fake. Thinking deeper, perhaps that was an incorrect choice by Alps and Apple, since in the lower left corner of the keycap kind of hides the legend, and all keyboards that came before this range and after, usually have the legends back in the top left, likely for a usability reason. No matter. Here we are!
PBTfans 1984 Keycap Set
https://kbdfans.com/products/pbtfans-1984
When comparing this set to the original in front me, I found there is one detail that’s slightly off. The modifier keys use Initial Caps instead of all lowercase (while the alphas remain uppercase). It’s not perfect, but it’s close enough. Close enough that you notice it only because everything else is working?
The practicallity of making my own keycaps design to mimic the original is a bit far outside this project scope, yeah…
The crazy thing for this keycap set was the window of availability, when the product went live and started to sell out, was prefisely bookending this project. Insane timing.

AKKO Penguin silent switches going on, and finally revealing how quiet a mechanical keyboard can be!
Luke Dorny · CC BY-ND 4.0Modern switches
Switch choice mattered just as much to me as almost everything else. I wanted something quiet, something satisfying, and something that didn’t announce itself every time I typed …in the office. At home noise is okay, but this was for office work.
I ended up with Akko Penguin switches. They’re tactile, surprisingly, without being loud, and fairly subdued without feeling dead. For only $45 I ended up with 120 switches for a 108-key board. And it really is incredible. They are fantastically quiet and comfortable. Quieter than a MacBook or Magic keyboard, by a large margin.
Akko Penguin Switches
https://en.akkogear.com/product/akko-penguin-switch/
The monster stand-in
Caps and switches sit in a Keychron Q6 Max. It’s a full-size keyboard with room for the arrow keys and a numeric keypad exactly where they’ve always been for me. It works with a Mac without needing any workarounds, and it connects over USB-C, Bluetooth, or 2.4GHz wireless.
Once it’s set up, it mostly disappears sonically while teminding me of the past withiut frustration. Which feels like the right outcome.
Keychron Q6 Max
https://www.keychron.com/products/keychron-q6-max-qmk-via-wireless-custom-mechanical-keyboard?variant=40799763071065
Alternate approaches & time
As I said, I did spend time exploring and considering building this from scratch. Designing a custom PCB, or even hand-wiring a full switch matrix. Services like PCBWay make it possible in theory, and the control is appealing.
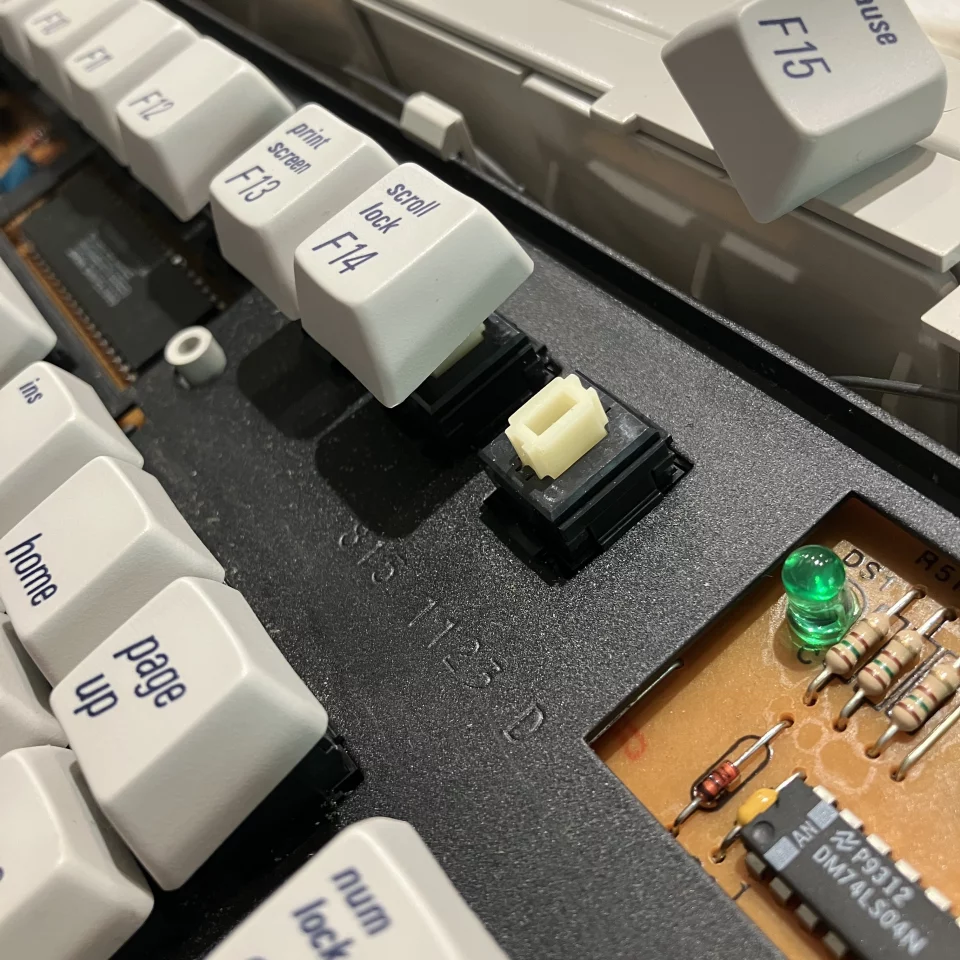
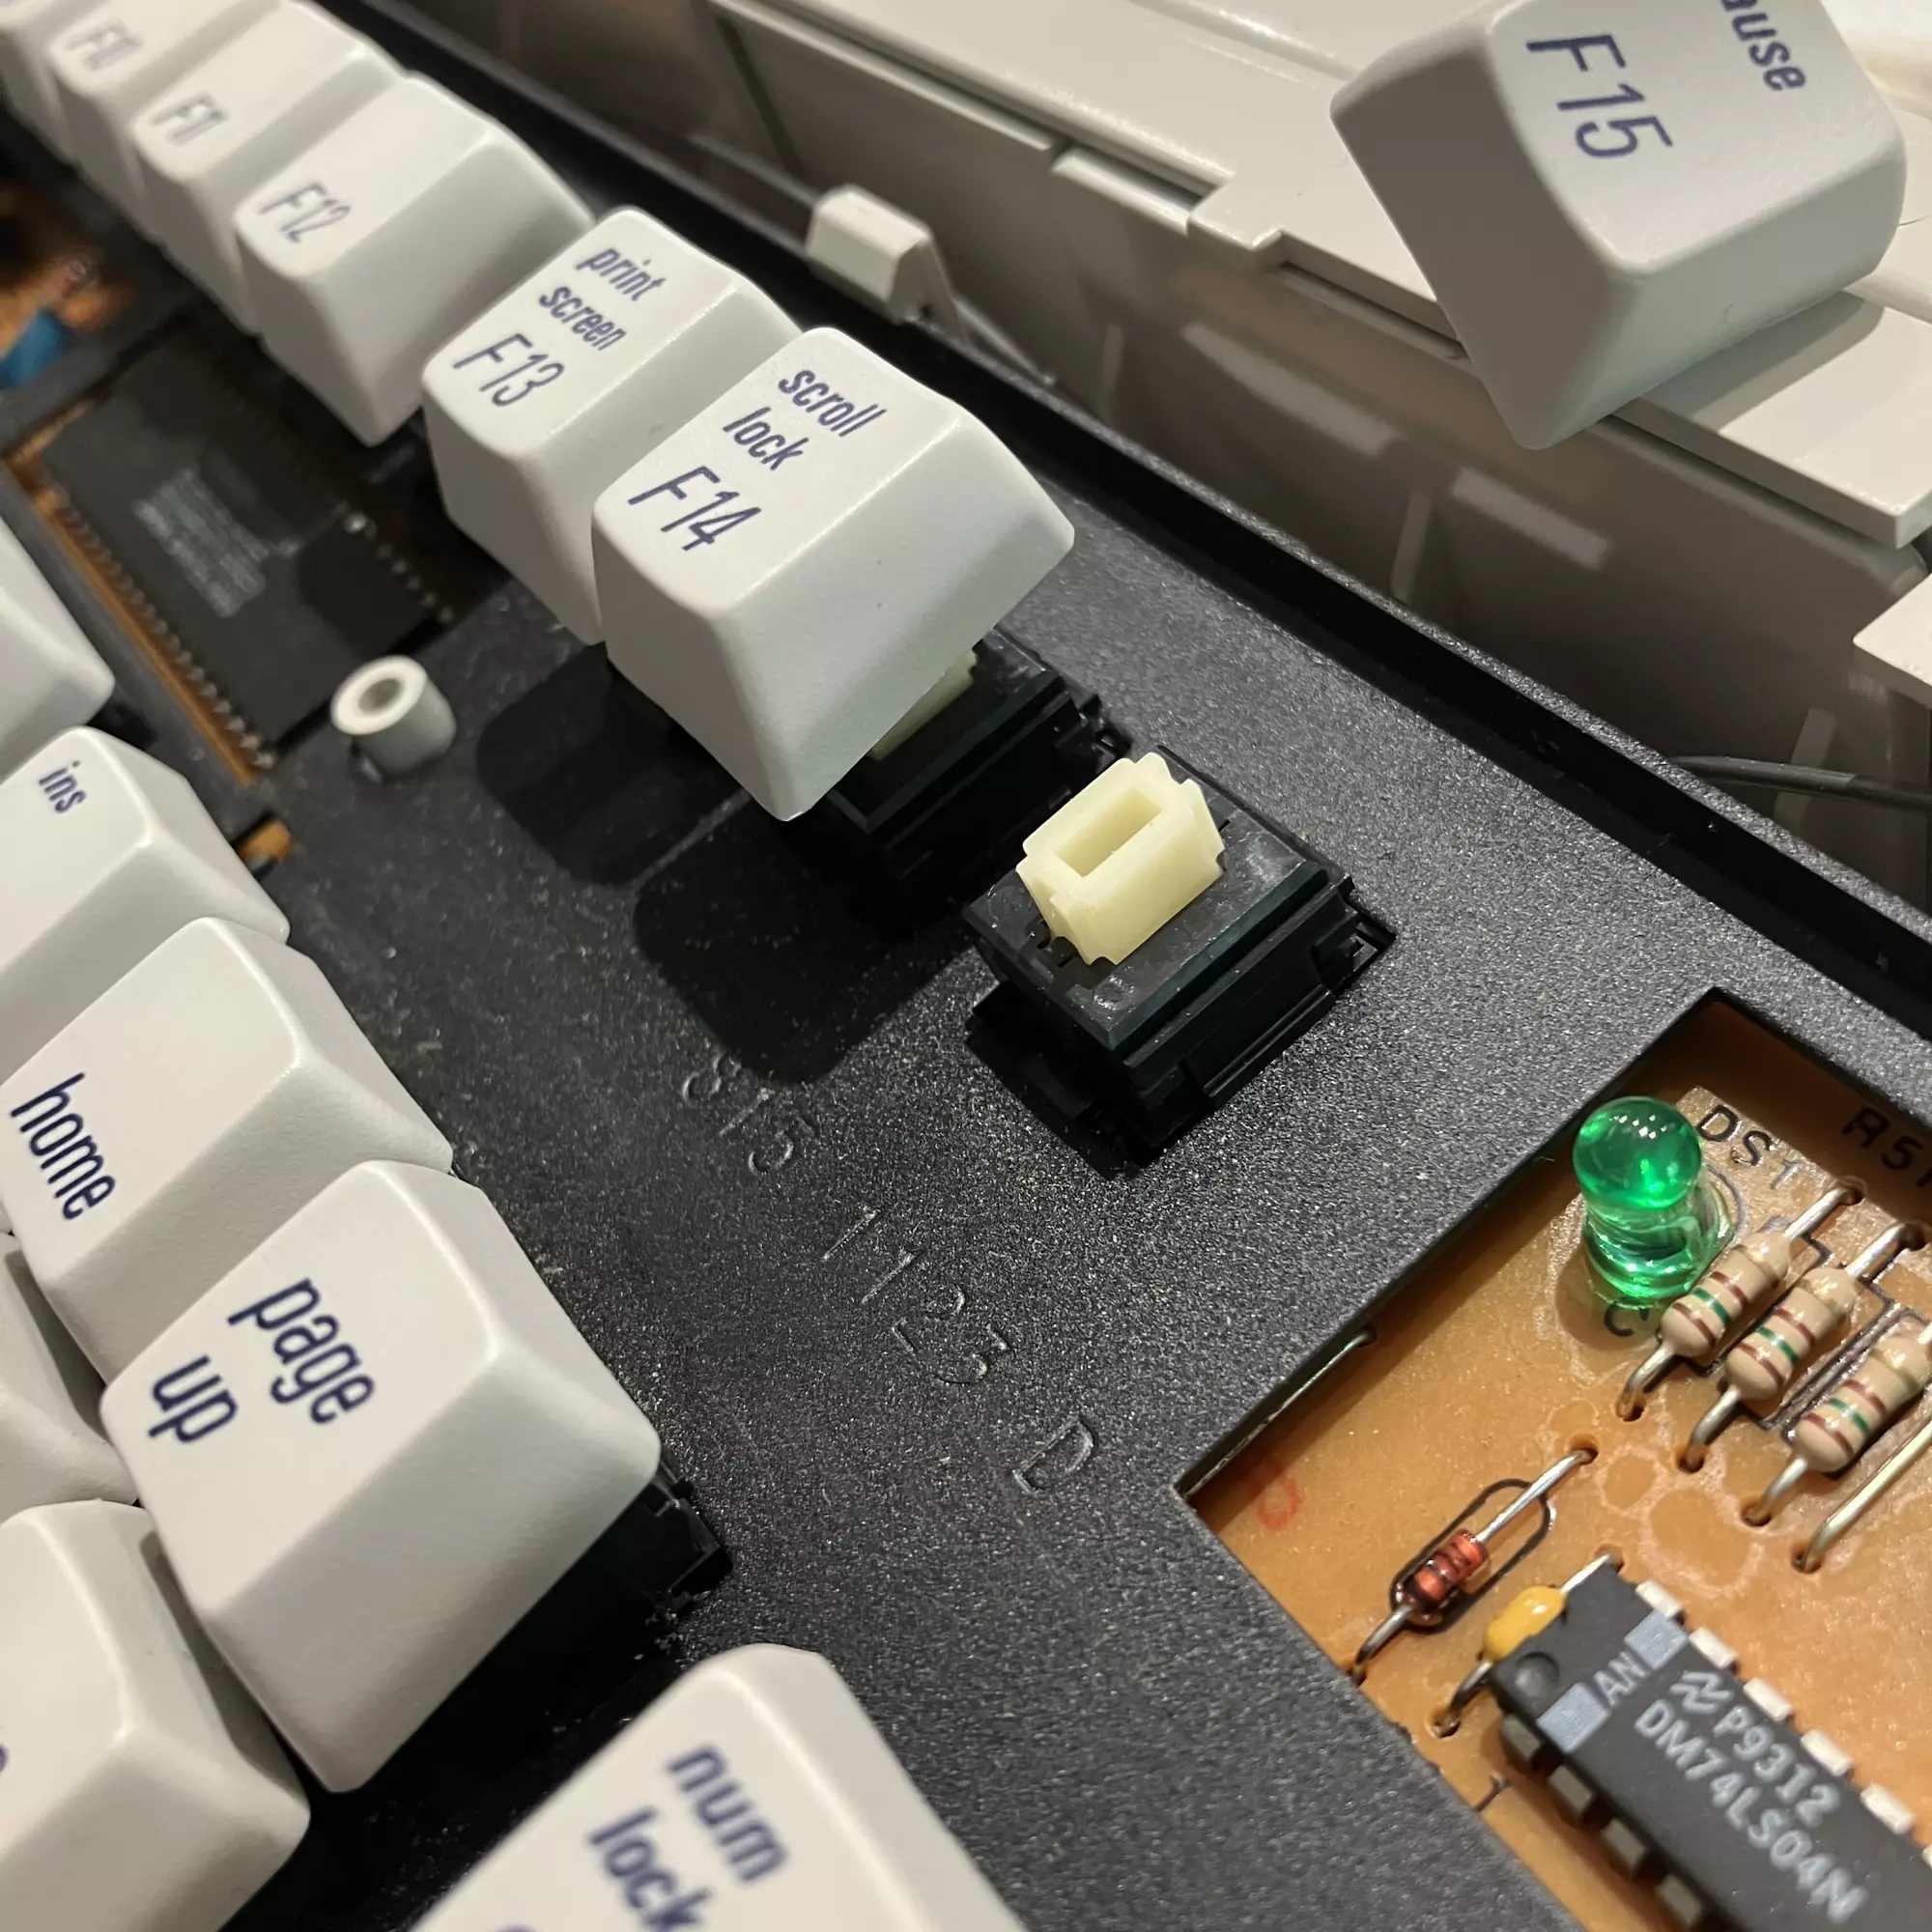
Onboard electronics from the M3501 AEK II board during my recent cleaning.
Luke Dorny · CC BY-ND 4.0In practice, obviously, it would quickly become a lengthy and expensive project built around iteration and …maintenance? Full-size keyboard PCBs surely take multiple revisions. Hand-wiring trades cost for time and frustration, but one bad solder joint can take out an entire column. Both approaches make sense if the build itself is the goal, right? But here I was trying to cap my time and money on this, constantly.
Besides, I wasn’t trying to prove I could build a keyboard, which I have with the numpad projects that Brian Warren and I built during the pandemic. I sure wish I could’ve done all of the other parts of that project, but that’s still on the shop desk.
Here I wanted to use one, and fast.
PCBWay
https://www.pcbway.com
Backporting not retrofitting
I’m generally interested in taking older equipment and figuring out how it might fit into the present. It can be slow work, and usually more effort than it looks like. I recently saw someone take a four-dollar battery-powered FM radio from the 80s, rebuild the handle on a home CNC machine using walnut, plate it in aluminum, and replace the internals with Bluetooth and rechargeable batteries over USB-C.
The radio still looked like itself, mostly, just updated quietly. That kind of project is exactly what pulls me in. Not erasing the past, just letting it keep going.
I’m coining this as Backporting, but someone surely has a better name for it.
Quality
It’s hard not to notice how consumer goods have shifted over time. Older products were often heavier and simpler, sometimes overbuilt, sometimes inefficient, but usually meant to last. Modern manufacturing optimizes for volume, and that changes what durability looks like. …and feels like.
Mechanical keyboards are an exception in an interesting way. The industry nearly disappeared and then came back with better materials, tighter tolerances, and more thoughtful engineering. It’s not universally better now, but when it’s good, it’s very good. The mechanical keyboard industry and fan groups run deep.
Off to work
The first day I brought this keyboard into work, a coworker immediately razzed me for having a “fancy keyboard.” Which is fair, on some level (and THEN it turned out that the other coworker across the hall had the exact same model Keychron but with Hall Effect switches, …crazy, small world).
But if you type for a living, the keyboard stops being an accessory and starts being infrastructure. Some people absolutely go too far with this stuff. For me, it feels no different than choosing a well-built bike instead of a basic department-store bike. Both work, but only one feels good every day.
Perspective and priorities. Have you ever typed on a horrible keyboard and got frustrated? Now imagine spending your entire days for your whole career with it. That’s the point.
Why this worked
This setup ended up nearly checking every box I had. It feels visually familiar, rooted in the design language I grew up with, does so quietly, reliably, and without fuss. It didn’t cost an unreasonable amount …and it didn’t take over my life.
I think that balance matters more to me than perfection. Though perfection would be…
Which brings us to…
The Three Rabbit-Hole Problem
A project like this starts by pulling in nearby ideas. You look at switches, then the PCB, then the case, and suddenly you’re imagining tooling, fabrication, group buys, and alternate versions of the same object.
I’ve started thinking of that as ”The Three Rabbit Hole Problem”. Once you open more than three paths at the same time, the gravity gets real. I’m very aware of how deep this could have gone. Choosing to stop wasn’t a lack of ambition. It was intentionally limited, but the call is still out there!
This keyboard now gives me familiarity, quiet, some modern reliability, and just enough restraint to keep it a tool instead of turning into something else.
I still happily use the refurbished AEK IIs at home.
Phew! Finally!
So now have a 5 lb solid block of aluminum, CNC’d out to house all current electronics, including USB-C, rechargeable battery, bluetooth, key remapping, modern media key functionality for common Mac features like music controls, etc., packed to the gills with multi-padded interior for great, quiet sound-deadening, a rotary knob for volume and muting, and omg the switches are so satisfying, …and quiet.
How about you?
As you can see, this project took some crazy turns and benefiting from some perfect timing. Do you have any ‘rabbit holes’ that spiraled for you or that you’ve turned into a hobby? I’d love to hear about it.
Updates
The technology available to people in their homes like 3D printing, home CNC, and remote PCB and machining for low cost is incredible, and in that vein, here are a few videos that have popped up within the last few months about this sort of topic and it’s indeed impressive:
Homemade laptop
https://youtu.be/MvMCPjDIHx8
Homemade mobile phone
https://youtu.be/qy_9w_c2ub0
3D printed metal laptop
https://youtu.be/tR4oXgiS-34
Updated commodore
https://youtu.be/_8bntwxnKX0
Homemade mini computer
https://youtu.be/rnwPmoWMGqk
Homemade Digital computer
https://youtu.be/KLdEn2B49mk
Homemade 3200MP camera!
https://youtu.be/KSvjJGbFCws
FYI
This post, and every post on my site, earns zero affiliate money unless clearly stated. I do not run affiliate links.
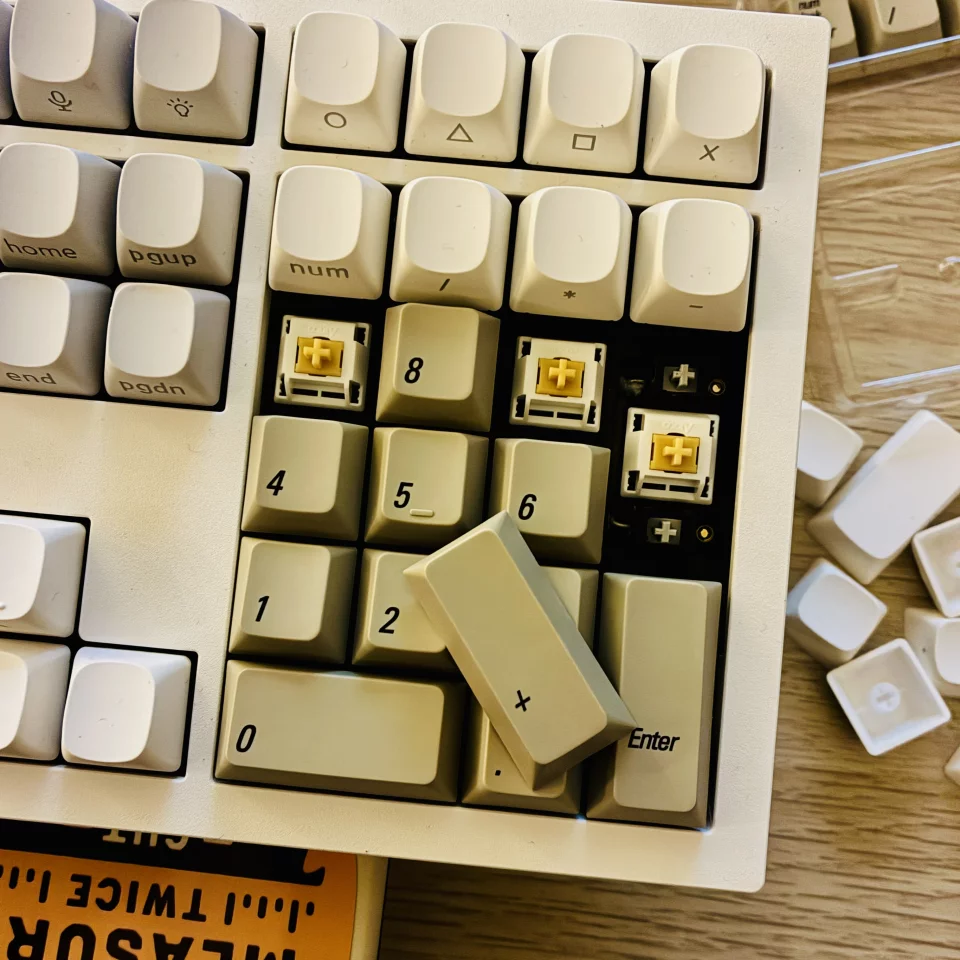

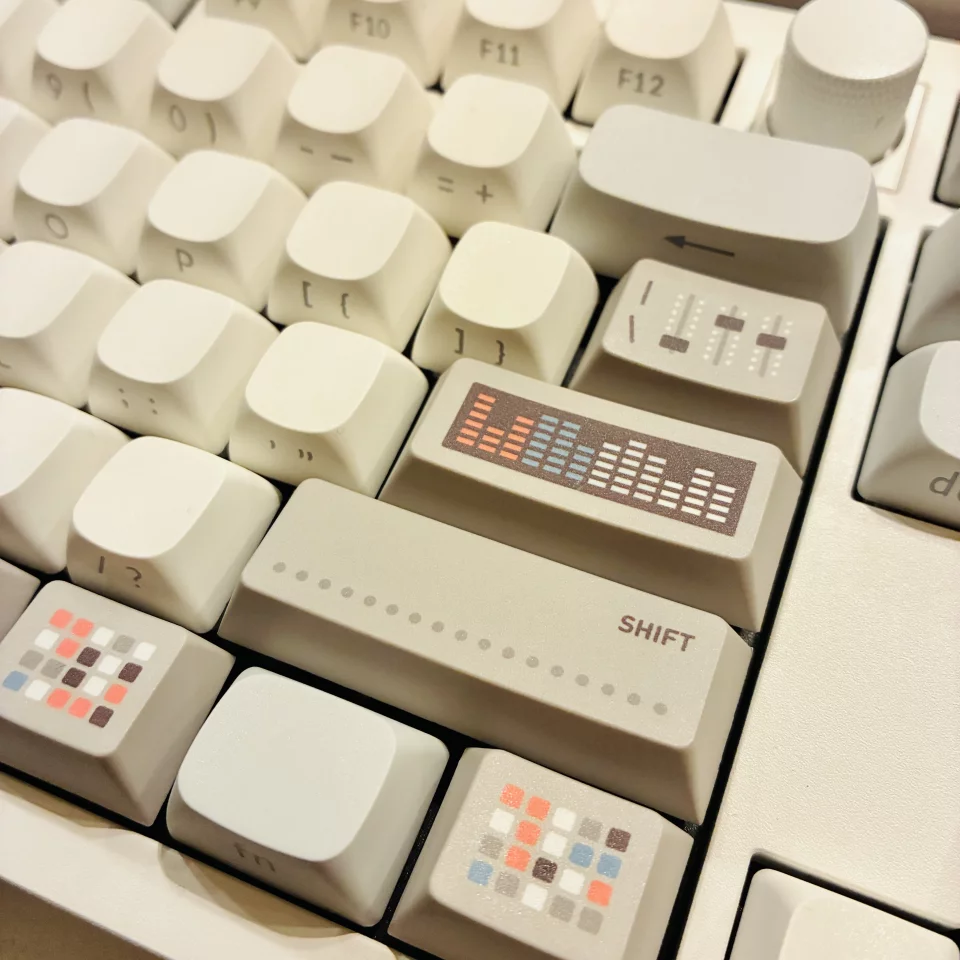
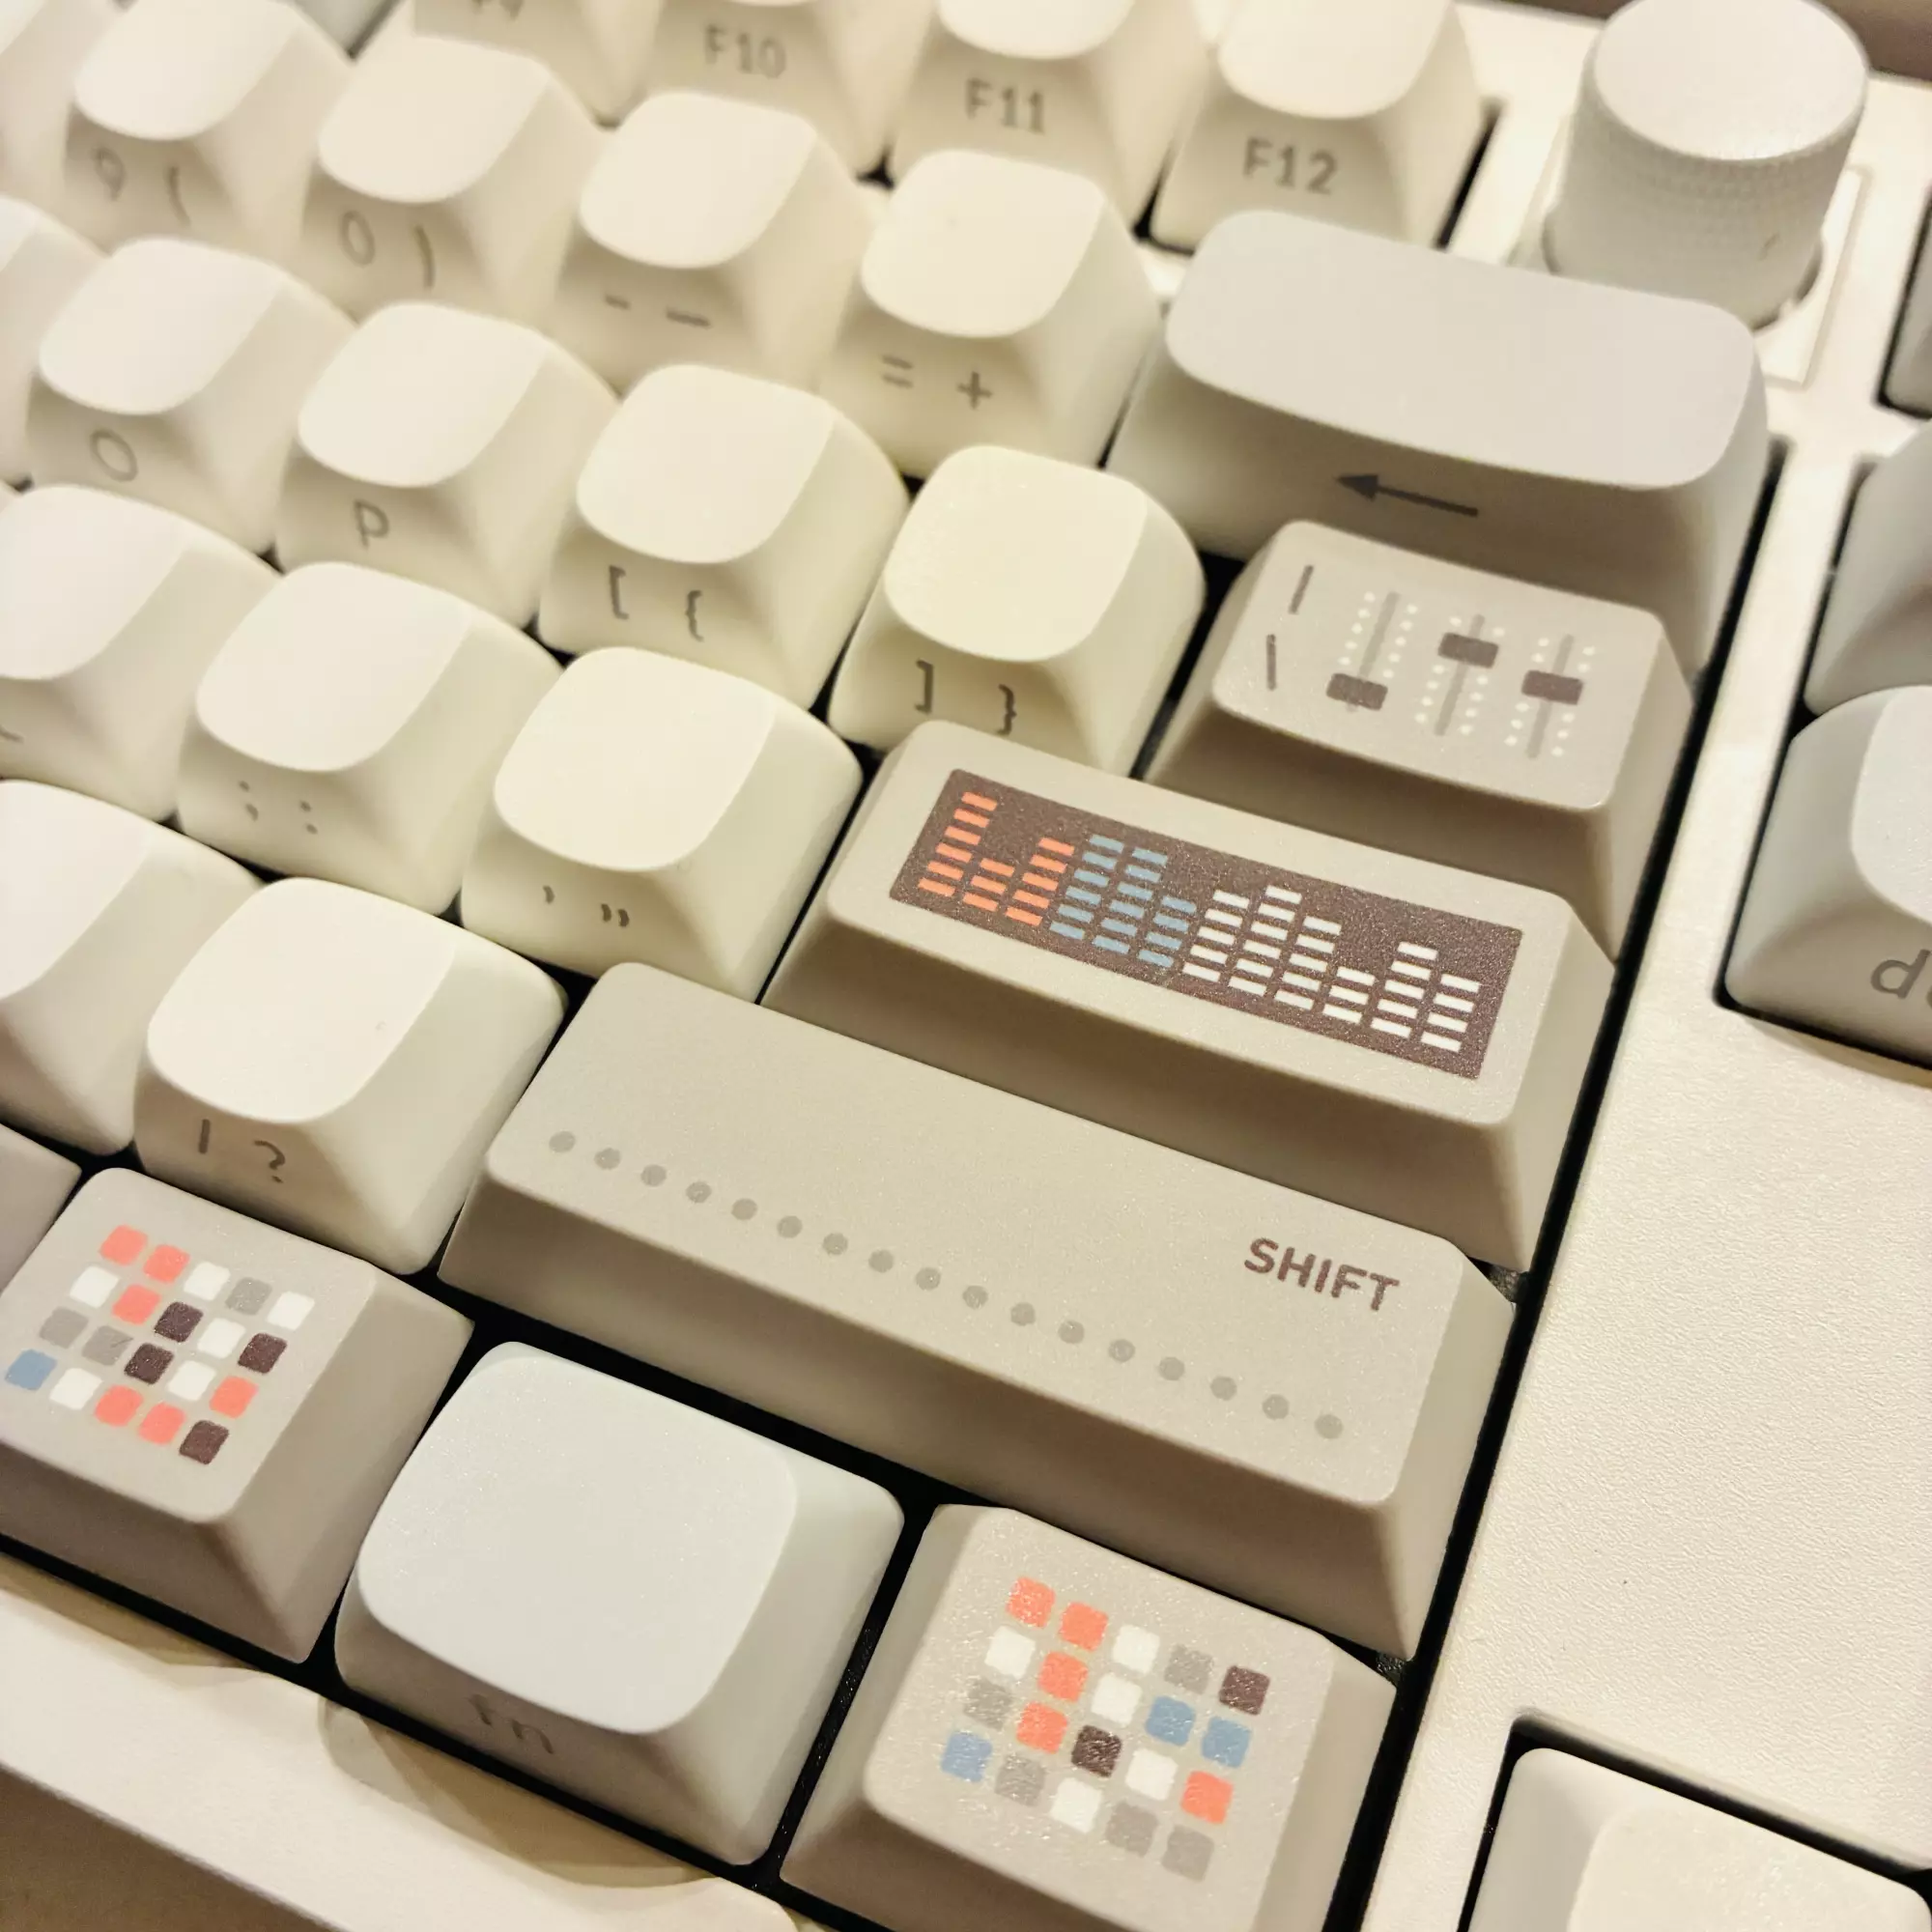
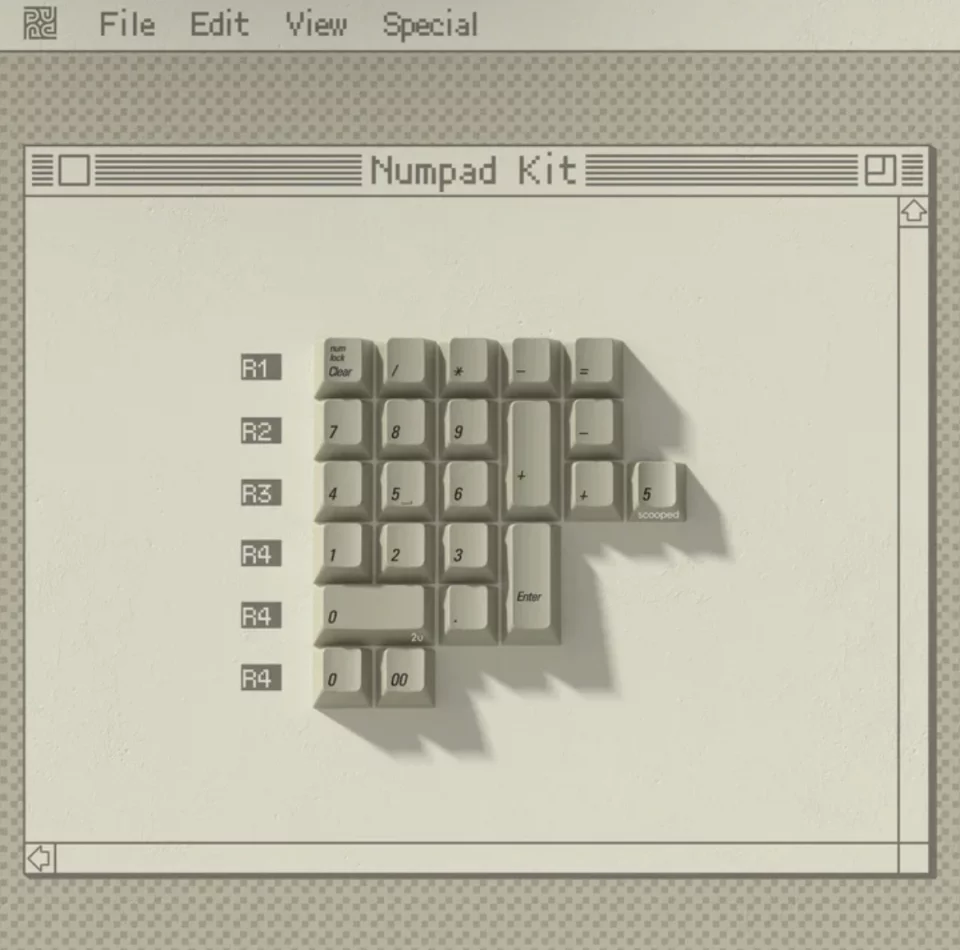
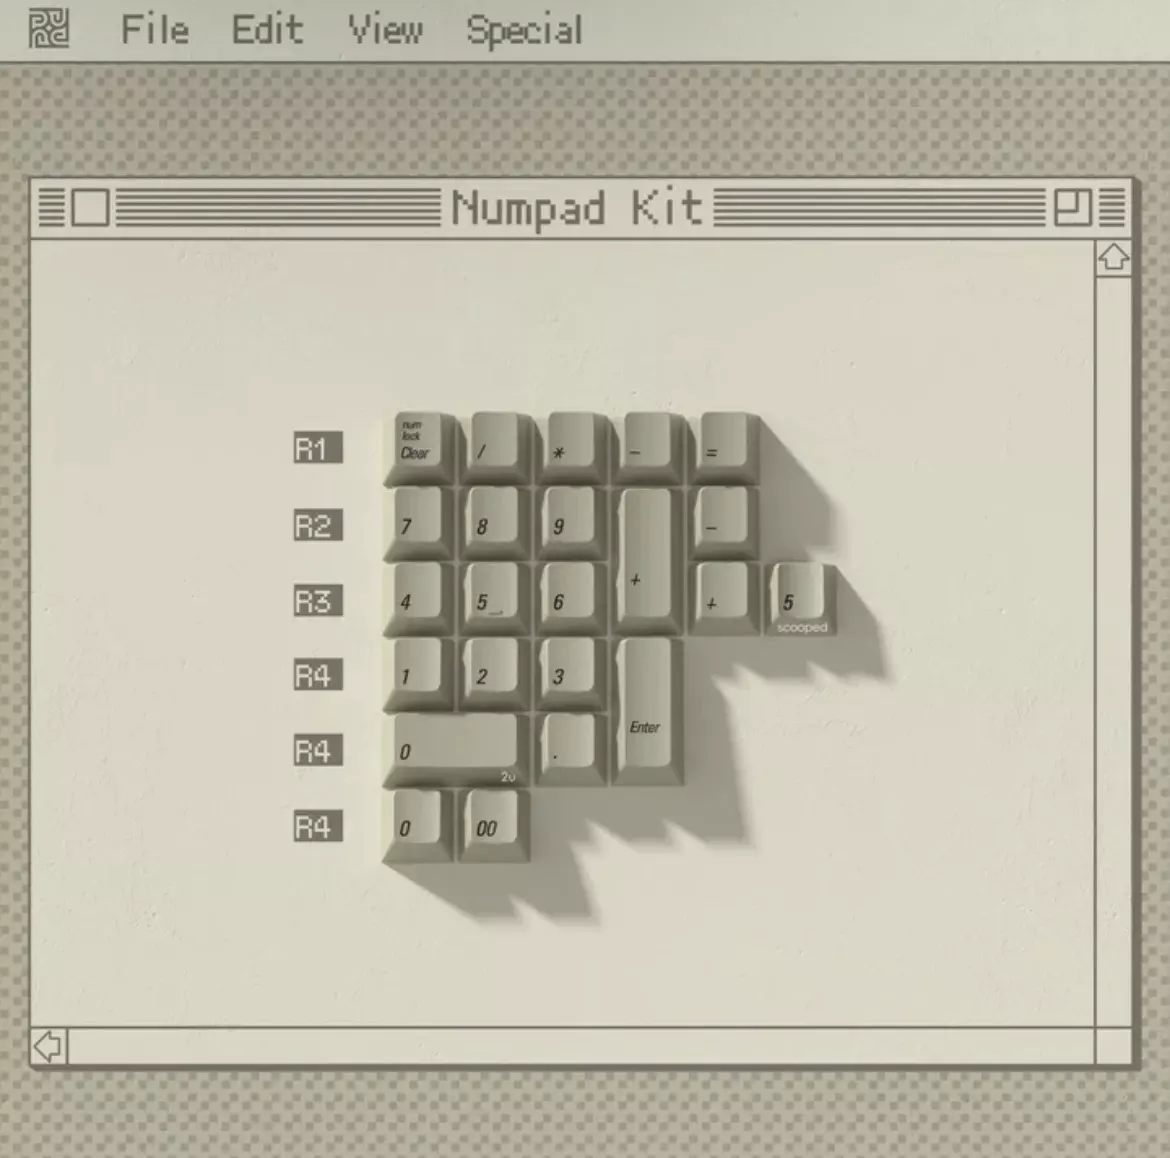
The 1984 keycaps going on the numpad of the new aluminum block of a board, to replace the abysmal experience of the standard Mac or MacBook keyboards we’ve had to suffer through for decades.
Luke Dorny · CC BY-ND 4.0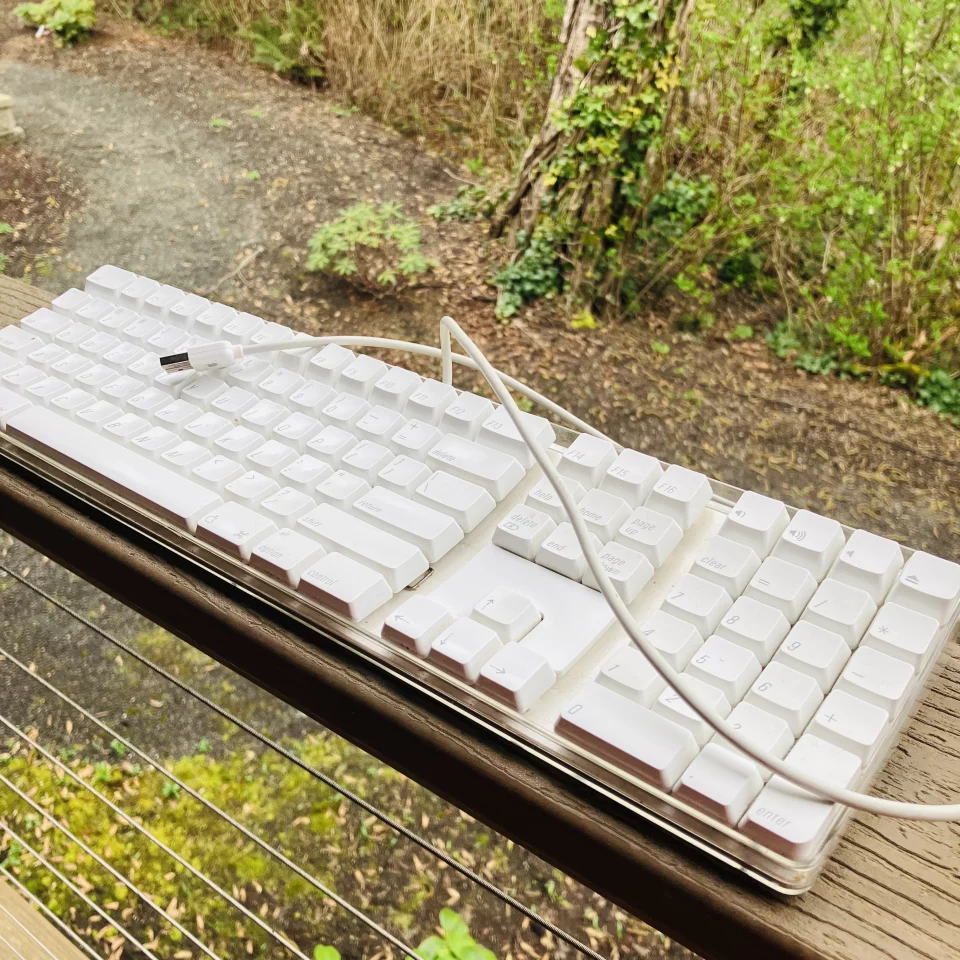

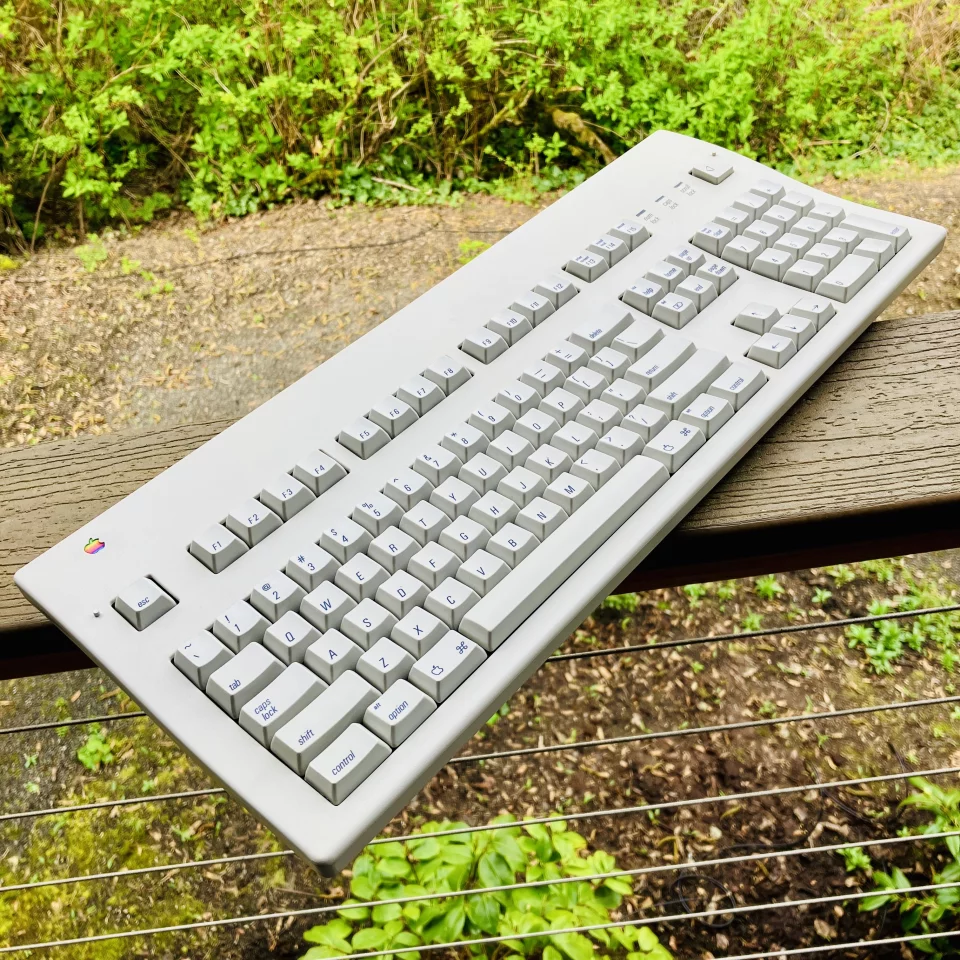
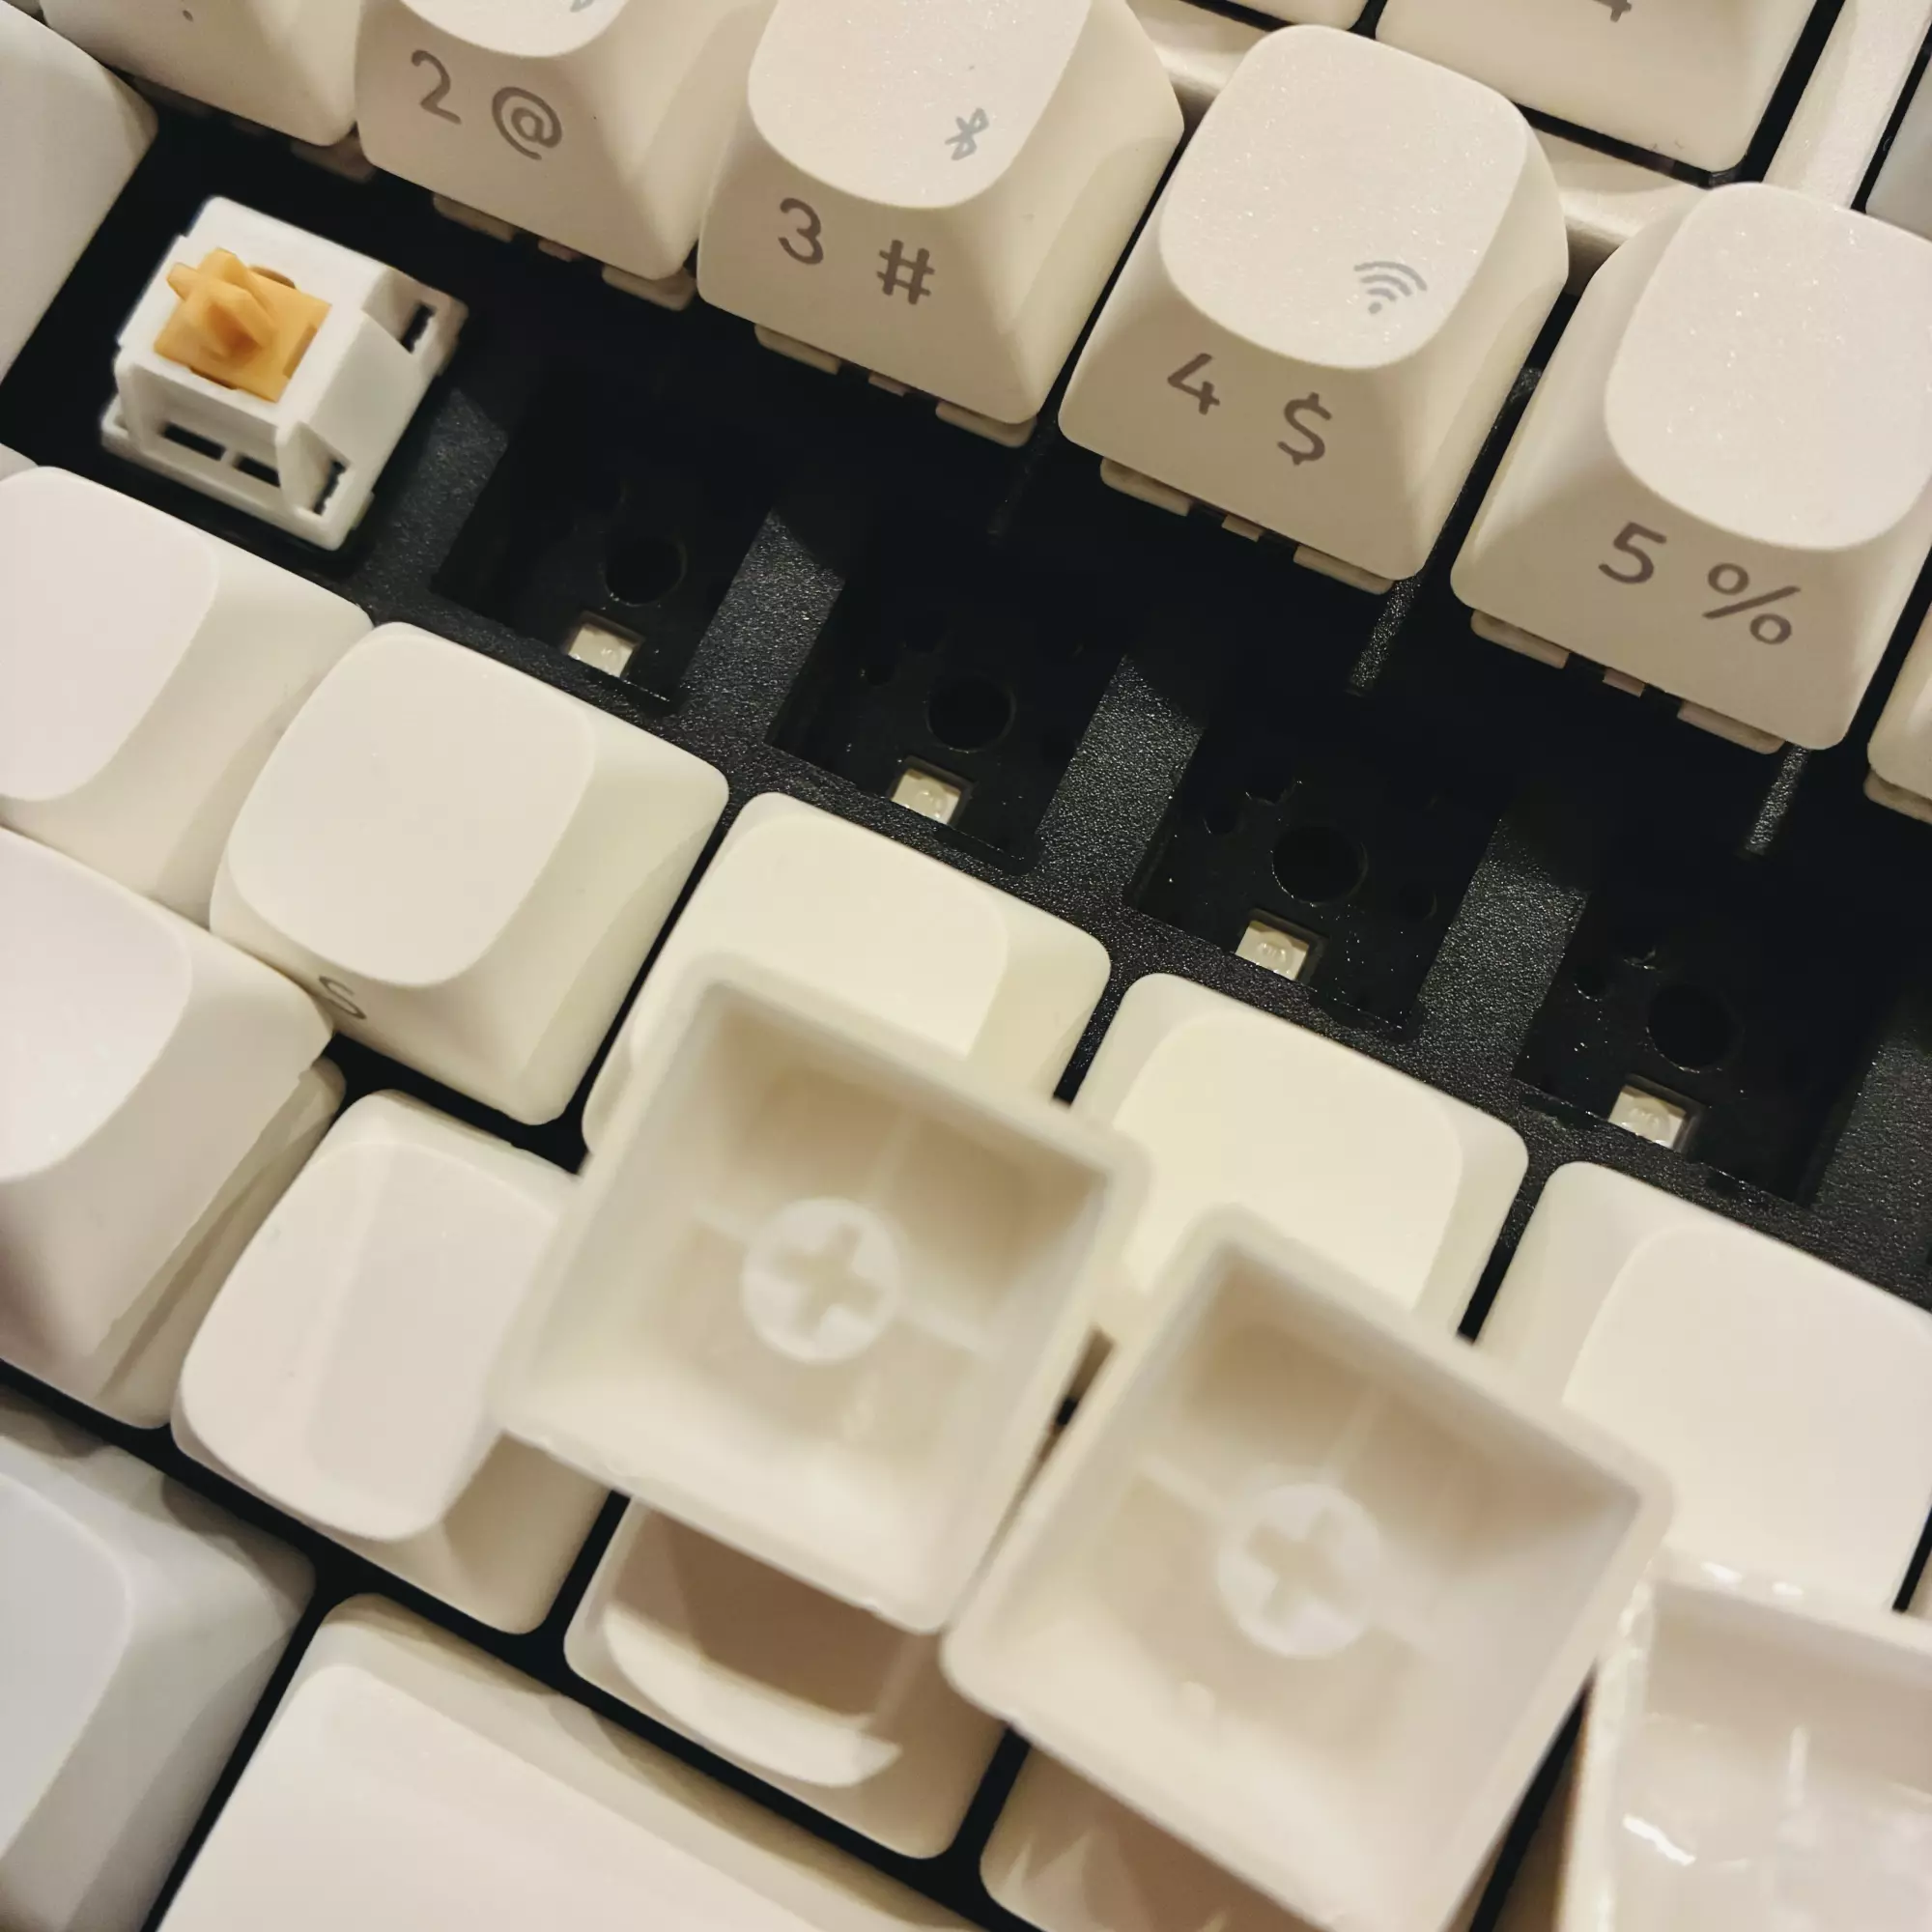
I recently refurbished this A1048 keyboard but its so hard to keep clean and one of the key switch mechanisms was not functioning properly.
Luke Dorny · CC BY-ND 4.0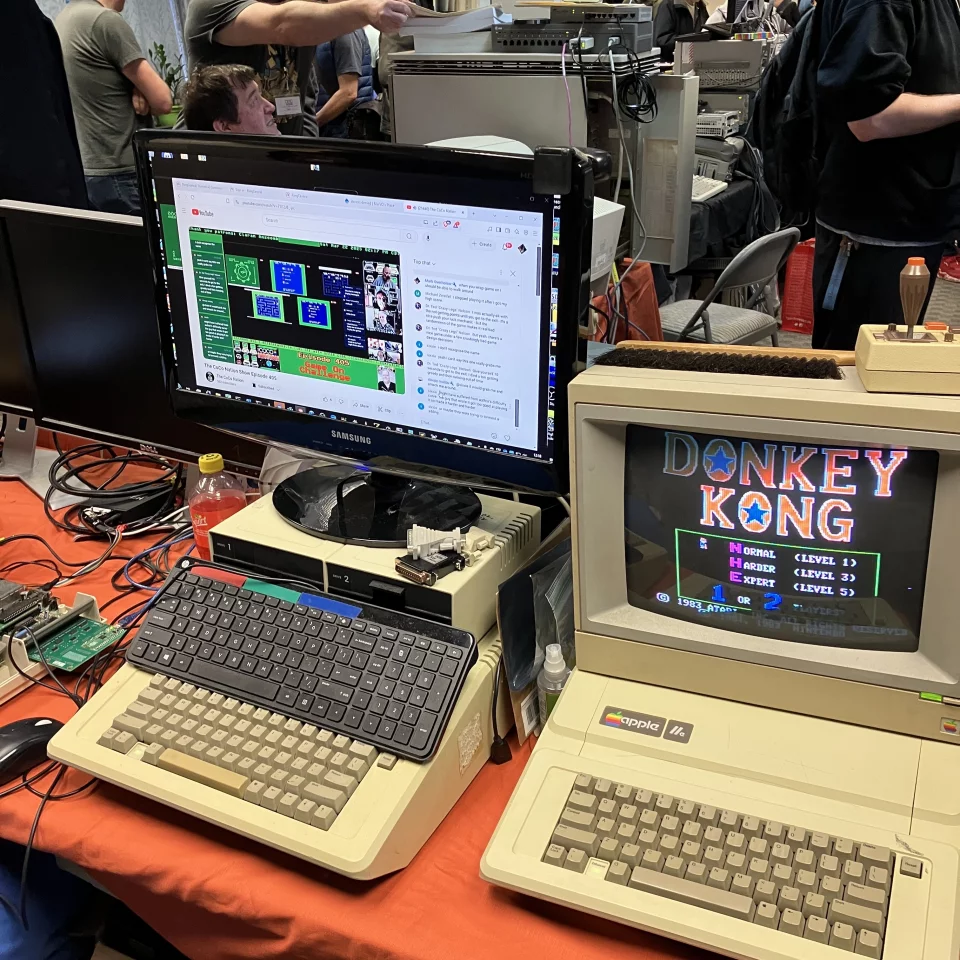

Just look at this Apple IIe with Donkey Kong running that we saw recently at a Seattle vintage computers meetup!
Luke Dorny · CC BY-ND 4.0